The Inspiration Behind the Challenge
I started carving just a couple of months ago, so making a Chinese dragon out of a butternut squash was a pretty bold move. It was a personal challenge to see what I was truly capable of. Let’s be honest: two months is a very short time to attempt something as intricate as a dragon!
The idea had been stuck in my head for a while, and I’d already started mapping out the details for the future. But when a colleague happened to mention a Chinese dragon in passing, I knew I couldn’t put it off any longer. I decided right then and there to stop procrastinating. I bumped this project from number three on my “to-do” list straight to the top spot.
Planning and Prototyping
My love for large-scale garden sculptures meant that a small dragon simply wouldn’t do. I wanted something more ambitious, so I set a goal: my dragon had to be at least 50 cm long! Since you can’t find a butternut squash that large, the best solution was to create a modular sculpture made of several segments. Dividing the dragon into sections allowed me to work beyond the natural size of the vegetable and gave me much more creative freedom. Fortunately, the serpentine shape of a Chinese dragon is perfect for this approach.
As I started planning the details, I realized this project would require a lot of material. Diving straight into carving with so little experience would have been a mistake – one wrong cut in carving, and the whole piece is ruined. To avoid wasting squash, I decided to start with modeling clay. It’s a material I’m comfortable with and understand well.
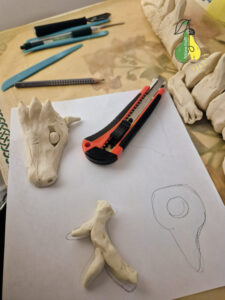
I sculpted a full-scale (1:1) model in plasticine, transferring all the ideas from my head into a physical form. Plasticine is very forgiving, which allowed me to refine every detail until I was completely satisfied. Once the model was ready, I simply traced the plasticine segments onto white paper and cut out templates. These stencils became my guide for carving the actual squash later on. This “plasticine phase” gave me a clear vision of the final sculpture and a foolproof way to recreate my design in the new medium.
You can see the process in the two photos below.
The Blueprint and Proportions
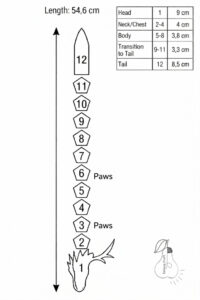
Below, you can see the construction diagram for my Chinese dragon. As shown, all the segments are numbered. The dragon consists of 12 main segments – a number that is deeply symbolic in Chinese culture, representing the 12 animals of the zodiac and the 12 months of the lunar year.
In the table in the top right corner, you’ll notice that the segments gradually get shorter as they approach the tail. This reduction in size was intentional to ensure the proportions look natural and dynamic. Based on this scheme, the total length was calculated to be 54.6 cm. However, my final piece ended up being approximately 58 cm, as I decided to slightly extend the tail and a couple of the front segments during the process.
From Concept to Carving: Working with Butternut Squash
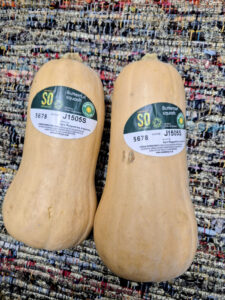
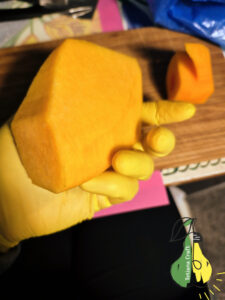
Now that you know the backstory, let’s get into the actual process of carving the dragon. Below is a photo of the star of the show: the butternut squash.
I have a small confession: I got so carried away with carving that I almost forgot to take a “before” photo! I only remembered when I had just two squashes left. In total, I used seven large solid sections (the “necks”) to complete the dragon. However, this number can vary since no two vegetables are identical; one squash might yield more segments than another. For the more complex parts, like the head and paws, I recommend hunting for the largest squashes you can find.
A quick tip for those unfamiliar with this vegetable: A butternut squash can be divided into two main parts: the bulbous end, which contains the seeds, and the long neck. For carving, I used only the neck. This part is dense, firm, and has no hollow cavities, making it the perfect material for intricate detail work.
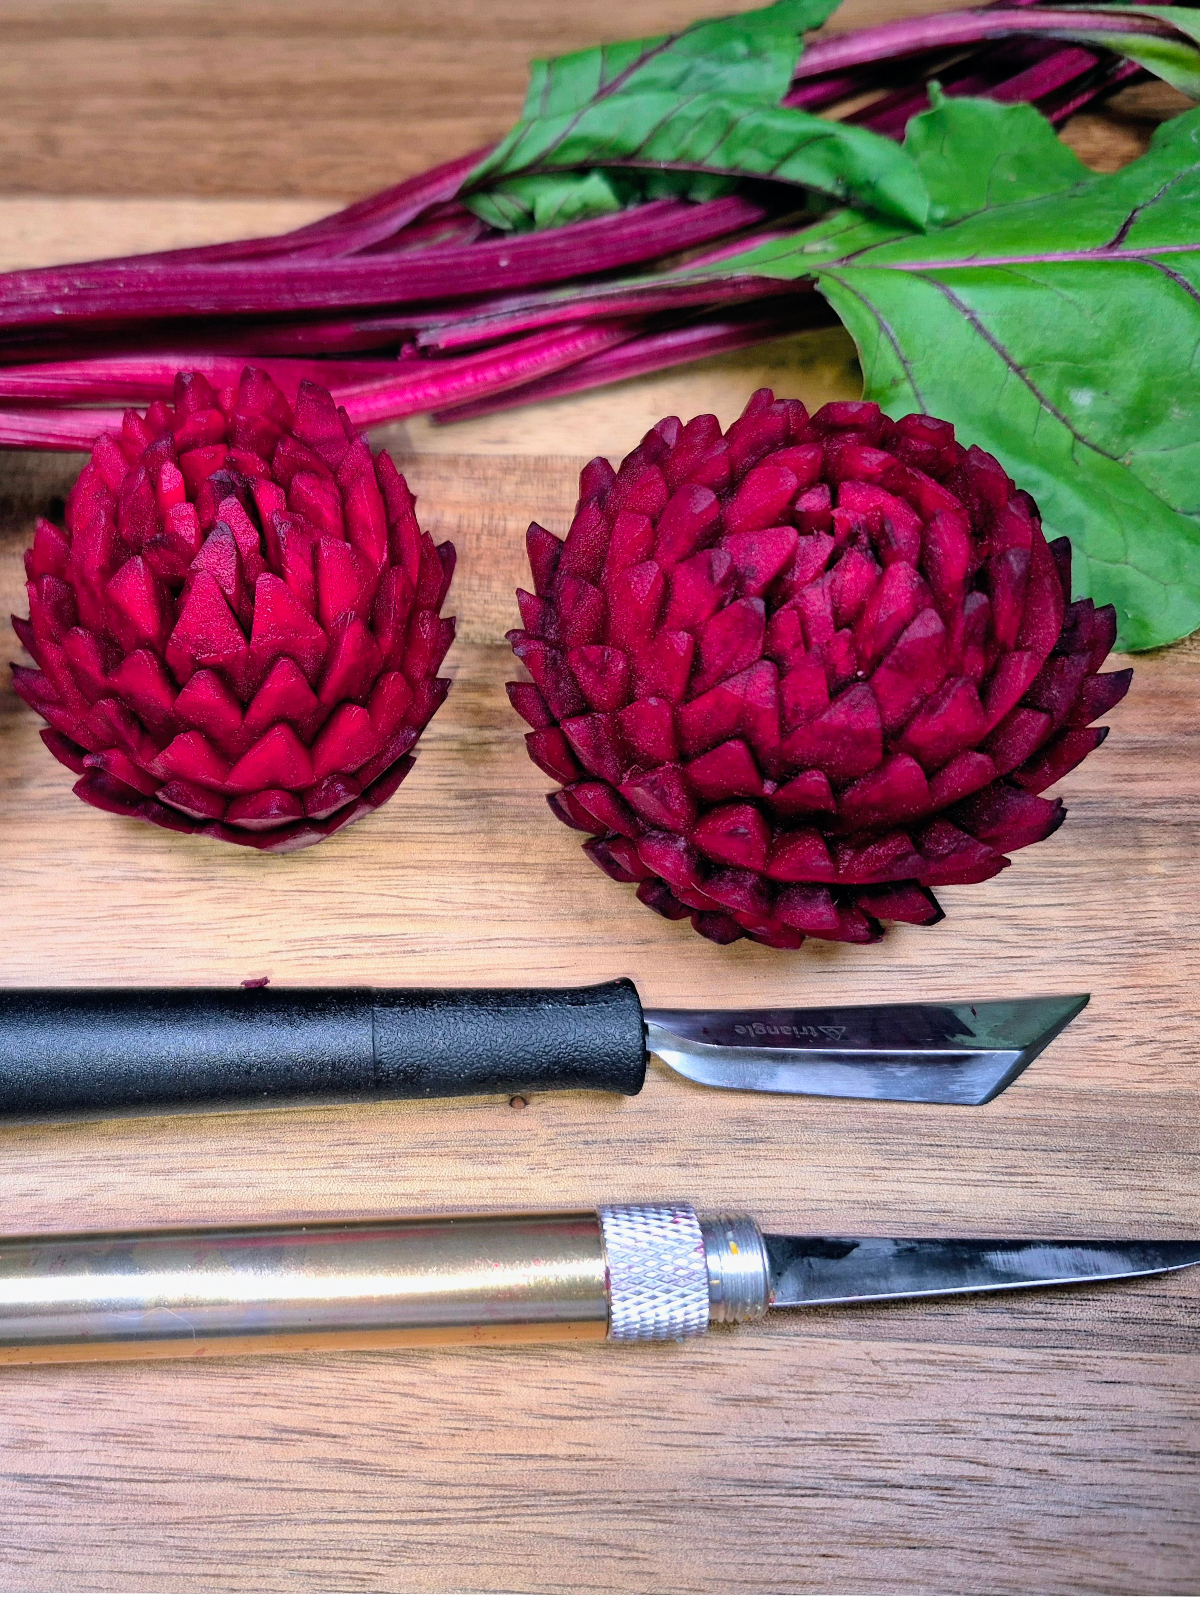
My Tools of the Choice
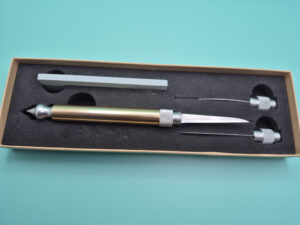
I also want to show you my carving knife. This is my primary tool, and it comes with three interchangeable blades. Most of the dragon was carved using this specific knife.
However, when I needed to cut away large pieces of squash according to my templates, I used a regular kitchen knife to speed things up. While the kitchen knife was great for the heavy lifting, all the intricate details were carved exclusively with the carving knife. I also used a few other specialized tools throughout the process. I’ll show you those later as I describe the specific steps where they came in handy.
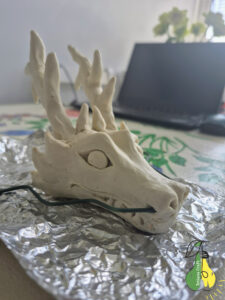
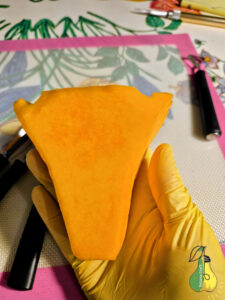
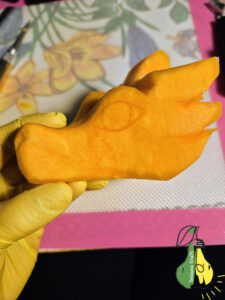
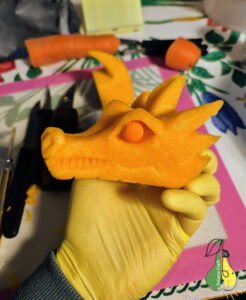
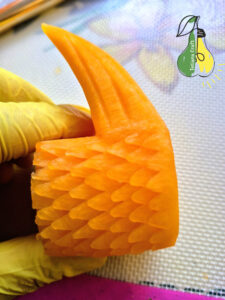
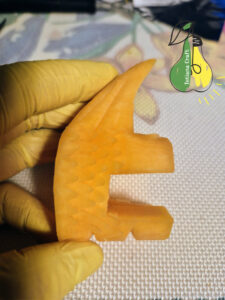
Carving the Dragon’s Head
The head is arguably the most important part of the sculpture. I took the largest butternut squash neck available and carefully peeled the skin from three sides using a kitchen knife. Once I had a clean surface, I placed my paper template on the squash and traced the outlines with a knife.
I made sure to leave a significant amount of extra height at the top. This was intentional because I wanted the two smaller central horns to be integral to the head (carved from the same block of squash). According to my design, the dragon features four horns in total: two small ones in the center and two larger ones, which were better suited to be carved separately and attached later.
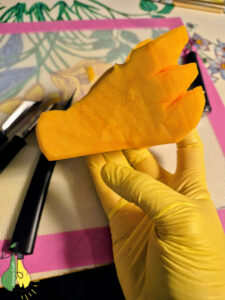
Shaping the Foundations
At this stage, there’s no need to worry about fine details. The goal is to block out the general silhouette and establish the main lines of the head. It’s crucial to carve with a steady, careful hand – while butternut squash is firm, it can also be surprisingly brittle. One wrong move or too much pressure, and a delicate part could snap off.
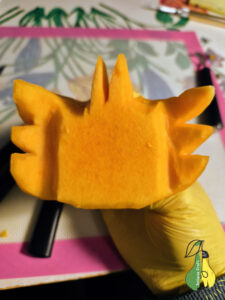
Refining the Details
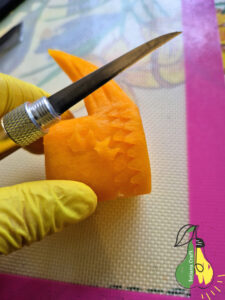
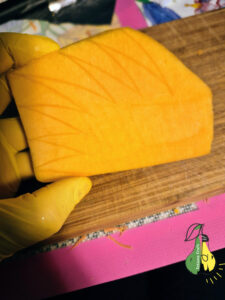
Once the larger forms were established, I moved on to the fine details. This is where the dragon’s personality really starts to emerge. Using the thinnest blade of my carving knife, I lightly etched the placement and outline of the eyes. At this stage, it’s all about precision. Barely skimming the surface to ensure everything is perfectly symmetrical before committing to deeper cuts.
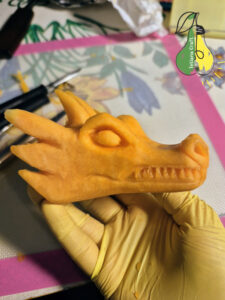
Bringing the Face to Life
I carefully carved out the eye, making sure the edges were clean. Next, using the fine tip of my carving knife, I sketched the outlines of the mouth and the teeth. Once I was satisfied with the overall look, I went back in to carve deeper recesses, giving the mouth more depth and definition.
It’s a slow process, but seeing the dragon’s expression take shape is incredibly rewarding. Here is how the head looked in the initial stages.
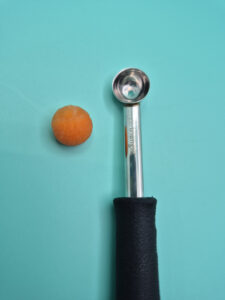
Adding Contrast with Carrot “Eyes”
During the carving process, I realized the dragon would look much more expressive with distinct eyeballs. To achieve this, I decided to use carrots. The vibrant orange of the carrot provides a beautiful contrast against the pale yellow of the butternut squash, making the eyes truly stand out.
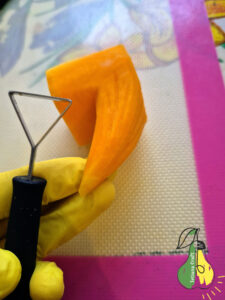
I used a size 10 melon baller (a round carving scoop) to create two small, perfect spheres. To secure them in place, I used small pieces of bamboo toothpicks. This simple addition brought a spark of life to the dragon’s face that wasn’t there before.
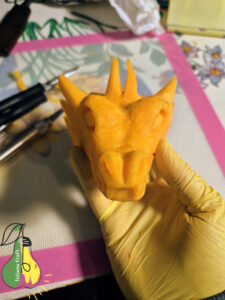
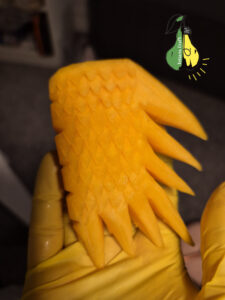
Adding Facial Scales
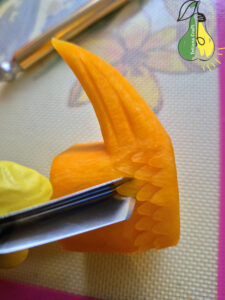
What is a dragon without its scales? For the face, I decided to add a fine, textured scale pattern using a V-shaped carving tool (V-gouge), which you can see in the photo. Instead of using a traditional undercutting technique, I simply pressed the tool into the surface to create small, uniform V-shaped indentations.
This process required extreme precision and a very light touch. I had to be especially careful around the eyelids, where the squash was at its thinnest. One bit of over-pressure could have easily punctured through the material, but the resulting texture adds a wonderful layer of realism to the dragon’s skin.
Preserving the Masterpiece: Storage and Chemistry
Since I carved this dragon in the evenings after work, the process spanned three days. As you know, vegetables are perishable, so finding a way to keep the segments fresh was crucial. Initially, I experimented with a soaking solution, but I learned some valuable lessons along the way.
The “Storage Bath” Formula:
-
Ice-cold water
-
Calcium Chloride: 1 tsp per liter (to maintain “stony” firmness).
-
Citric Acid: 1/2 tsp per liter (to preserve color and keep the water clear).
Lessons Learned: I discovered that it’s best not to store finished parts in this solution for long periods. My dragon’s head soaked up too much water, becoming brittle, and the fine scales I worked so hard on began to “swell” and lose their definition.
Why did this happen? This is likely due to osmosis. The plant cells absorb excess water to reach equilibrium, causing the tissues to swell (turgor pressure), which stretches the surface and masks fine carvings.
The Better Way to Store:
Now, I use a more effective method: I dip the finished piece into the solution for just 5-10 minutes. Then, I wrap it tightly in plastic wrap and store it in the vegetable crisper drawer of the refrigerator. This keeps the segments perfect for several days without losing detail.
Future Improvements: Metabisulfite
In the future, I plan to replace citric acid with Sodium Metabisulfite.
-
Why it’s better: While citric acid only adjusts pH, Metabisulfite is a powerful antioxidant and antimicrobial agent. It is much more effective at preventing browning (oxidation) and stopping bacterial growth.
Fortunately, Calcium Chloride and Metabisulfite work perfectly together – a “power couple” for vegetable preservation.
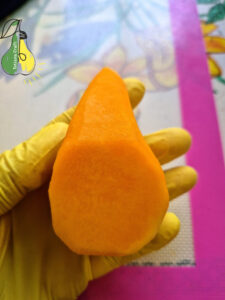
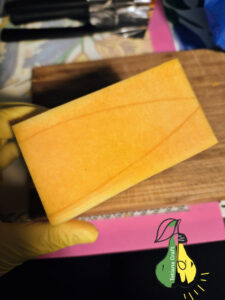
Carving the Body Segments
The body segments are relatively straightforward. They all share the same shape but differ in size. Because a dragon’s body naturally tapers as it approaches the tail, the segments must gradually become smaller. As shown in the blueprint table at the beginning of this article, I divided the body into three main sections, using three stencils that were identical in shape but scaled to different sizes.
To get started, I cut out a segment according to the template, just like you can see in the two photos below.
Texturing the Segments
Next, I used a triangular ribbon tool to add more detail. I carved longitudinal grooves along the spines (the sharp ridges along the dragon’s back) to give them more texture and definition.
I also used this same tool to carve two parallel lines along the bottom of each segment. This was done to mimic the look of ventral scales (the smooth, plated skin found on the underside of a snake or dragon), which adds to the mythical, serpentine realism of the piece.
Creating a Flexible Body
To connect the segments, I needed to make a hole through the center of each one. For this, I used a vegetable corer. The resulting hole was large enough to thread a resistance band through the entire body.
This was an experimental approach: if I had used standard toothpicks or skewers to join the segments, the dragon would have been rigid and static. Using an elastic band instead allowed the body to be flexible. This gave me the freedom to pose the dragon in different positions.

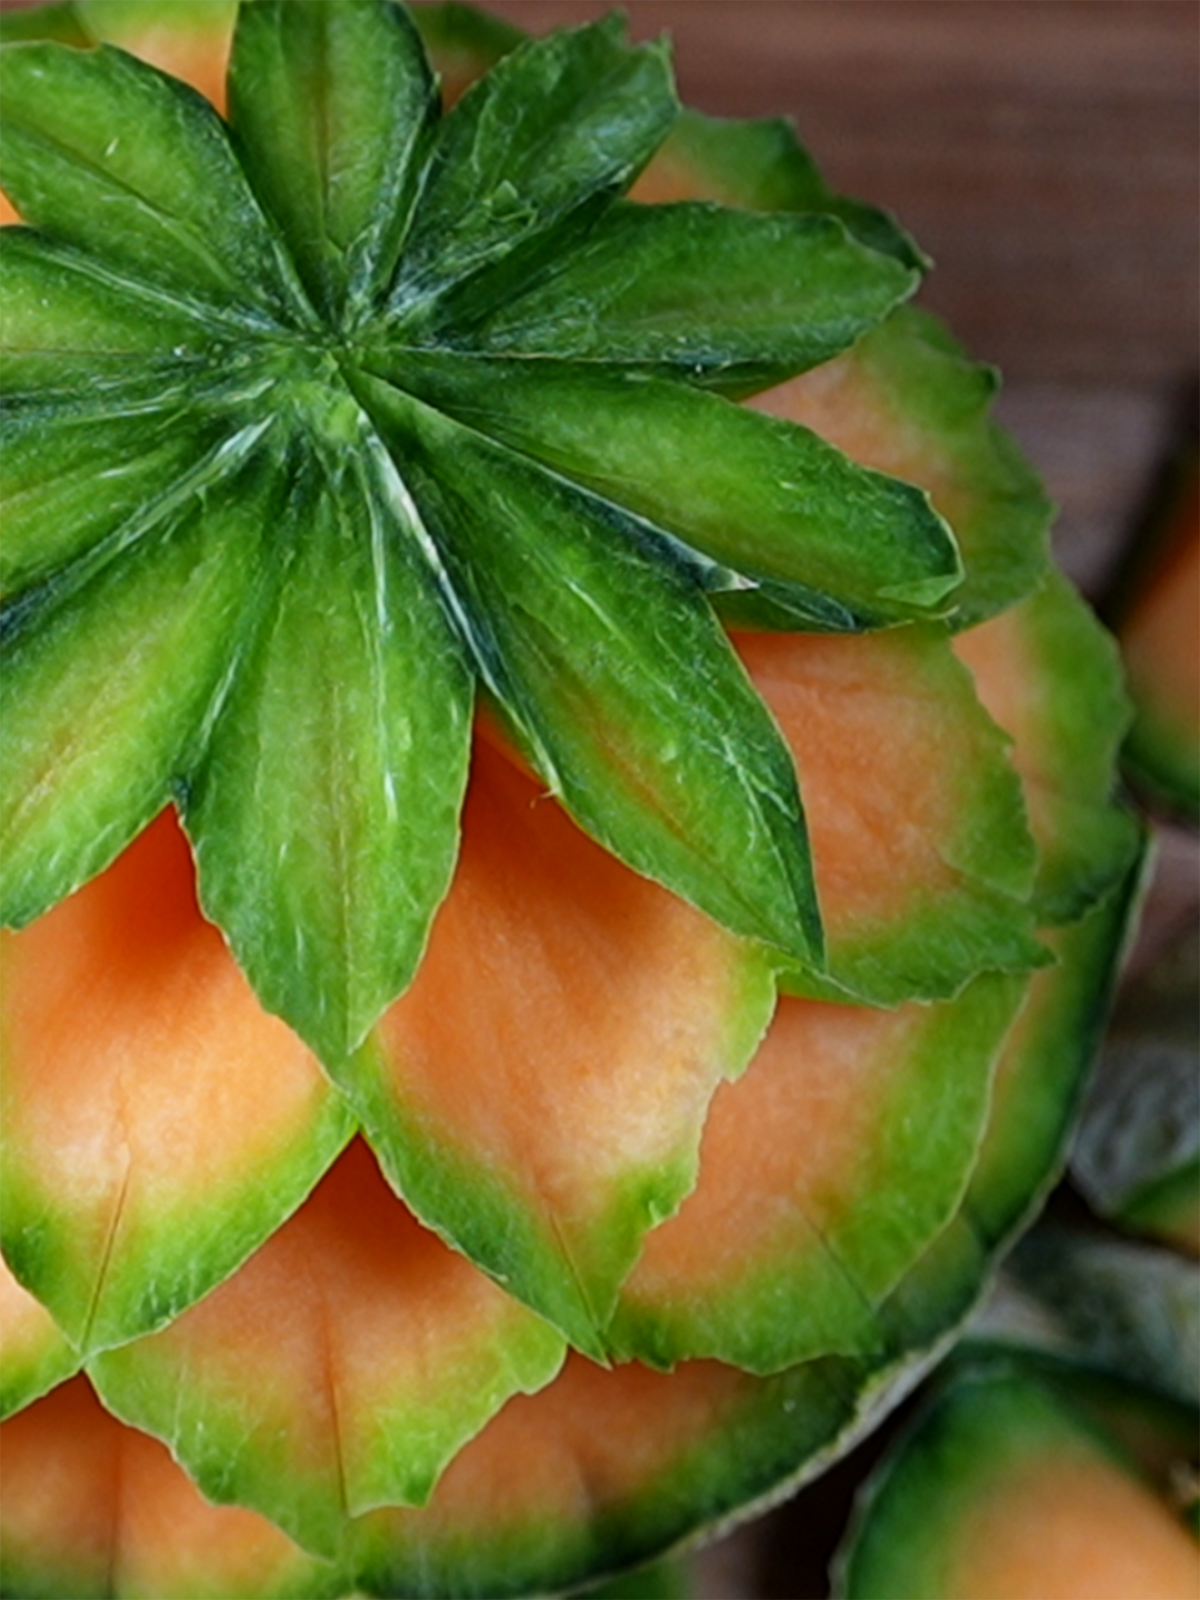
Carving the Body Scales
Carving the scales was surprisingly quick, yet the final result looks very effective. I used a simple two-step technique that many carvers will recognize from creating dahlia flowers.
The Cut: First, I used the V-tool to carve out a single row of V-shaped scales.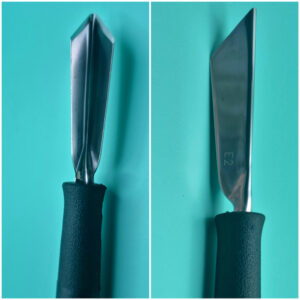
The Relief: Next, I took my favorite carving knife and carefully made a thin undercut just above the row, removing a small strip of squash.
I repeated these steps row by row, working my way across the segment. This “cut and relief” method creates a beautiful 3D effect, making the scales look like they are overlapping naturally. It’s a straightforward technique, but it gives the dragon’s body a professional and intricate look.
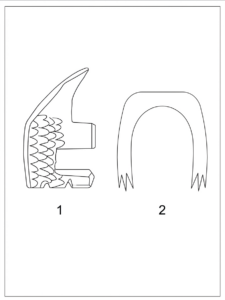
The Legs: A Lesson in Timing
I have a small confession: I completely forgot to take individual photos of the legs! I took so many pictures throughout the process, but I only realized this oversight once the dragon had already “met its end” in the bin. Since butternut squash is a perishable product, time is always of the essence, and by then, it was too late for a photoshoot.
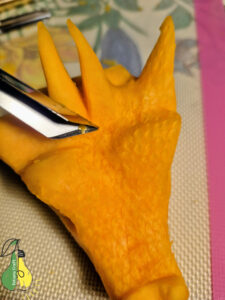
However, I do have a photo of the specific body segment with a slot where the legs are inserted. Aside from that attachment point, the segments with legs were crafted using the same techniques as the rest of the body.
To fill in the gaps, I’ve included a diagram below showing the shape of the legs and the segment. This sketch accurately represents the form of the pieces I carved.
The Final Touch: The Tail
Carving the 12th and final segment – the tail – was incredibly satisfying. After spending three evenings working on this dragon after my day job, it was a relief to realize the project was finally coming together. You can see the process of shaping this final piece in the photos below.
I want to emphasize a crucial step: as soon as each individual segment was finished, I immediately submerged it in the ice-cold bath of calcium chloride and citric acid. Don’t skip this! It is a vital step for preserving the squash and ensuring your hard work stays crisp and fresh until the final assembly.

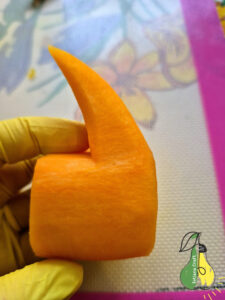
The Finishing Touches: Horns and Whiskers
For the whiskers and the two large horns, I chose carrots to create a striking color contrast. However, this turned out to be a bit of a “live and learn” experience.
While the carrot horns looked absolutely perfect when I first attached them to the head, I noticed a problem within 24 hours. Compared to butternut squash, carrots lose their moisture much faster, causing them to shrink. This led to small gaps forming where the horns met the head, making the fit look less seamless than I intended. Next time, I would definitely carve the large horns from butternut squash to maintain structural integrity.
On the other hand, carrots are a fantastic choice for the whiskers. Their natural flexibility and vibrant orange color make the dragon look much more dynamic and alive!
The Engineering Behind the Flex: Anchors and Bands
Finding the right material to hold the dragon together was a challenge. I needed something both elastic and incredibly strong. A standard round rubber band wouldn’t work because it would be impossible to tie a secure knot with enough tension. Then, I had a “Eureka!” moment: my fitness resistance bands. These bands are durable, thin, and long. I simply cut them into thin strips to create a custom elastic cord.
But how to attach the band to the head and tail? After testing various screws, I found the perfect solution: self-drilling drywall anchors (specifically the zinc or plastic types with a wide thread, as shown in the photo).
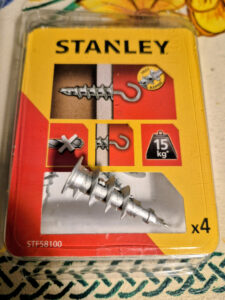
Why these specific anchors? Standard screws just pull out of the squash, but these anchors have a very deep, aggressive thread. They grip the dense flesh of the butternut squash perfectly. Even when I pulled on the construction with significant force, the anchors stayed firmly in place.
The Final Assembly:
I divided the dragon’s assembly into two main sections:
-
I secured one end of the resistance band to the head using an anchor.
-
I did the same for the tail.


-
During the final assembly, I threaded all the segments onto the band, pulled it tight to create the necessary tension, and tied the two ends together. After securing the knot, I trimmed the excess band.
This tension is what allows the dragon to hold its shape while remaining flexible enough to bend and “twist” into life-like poses.
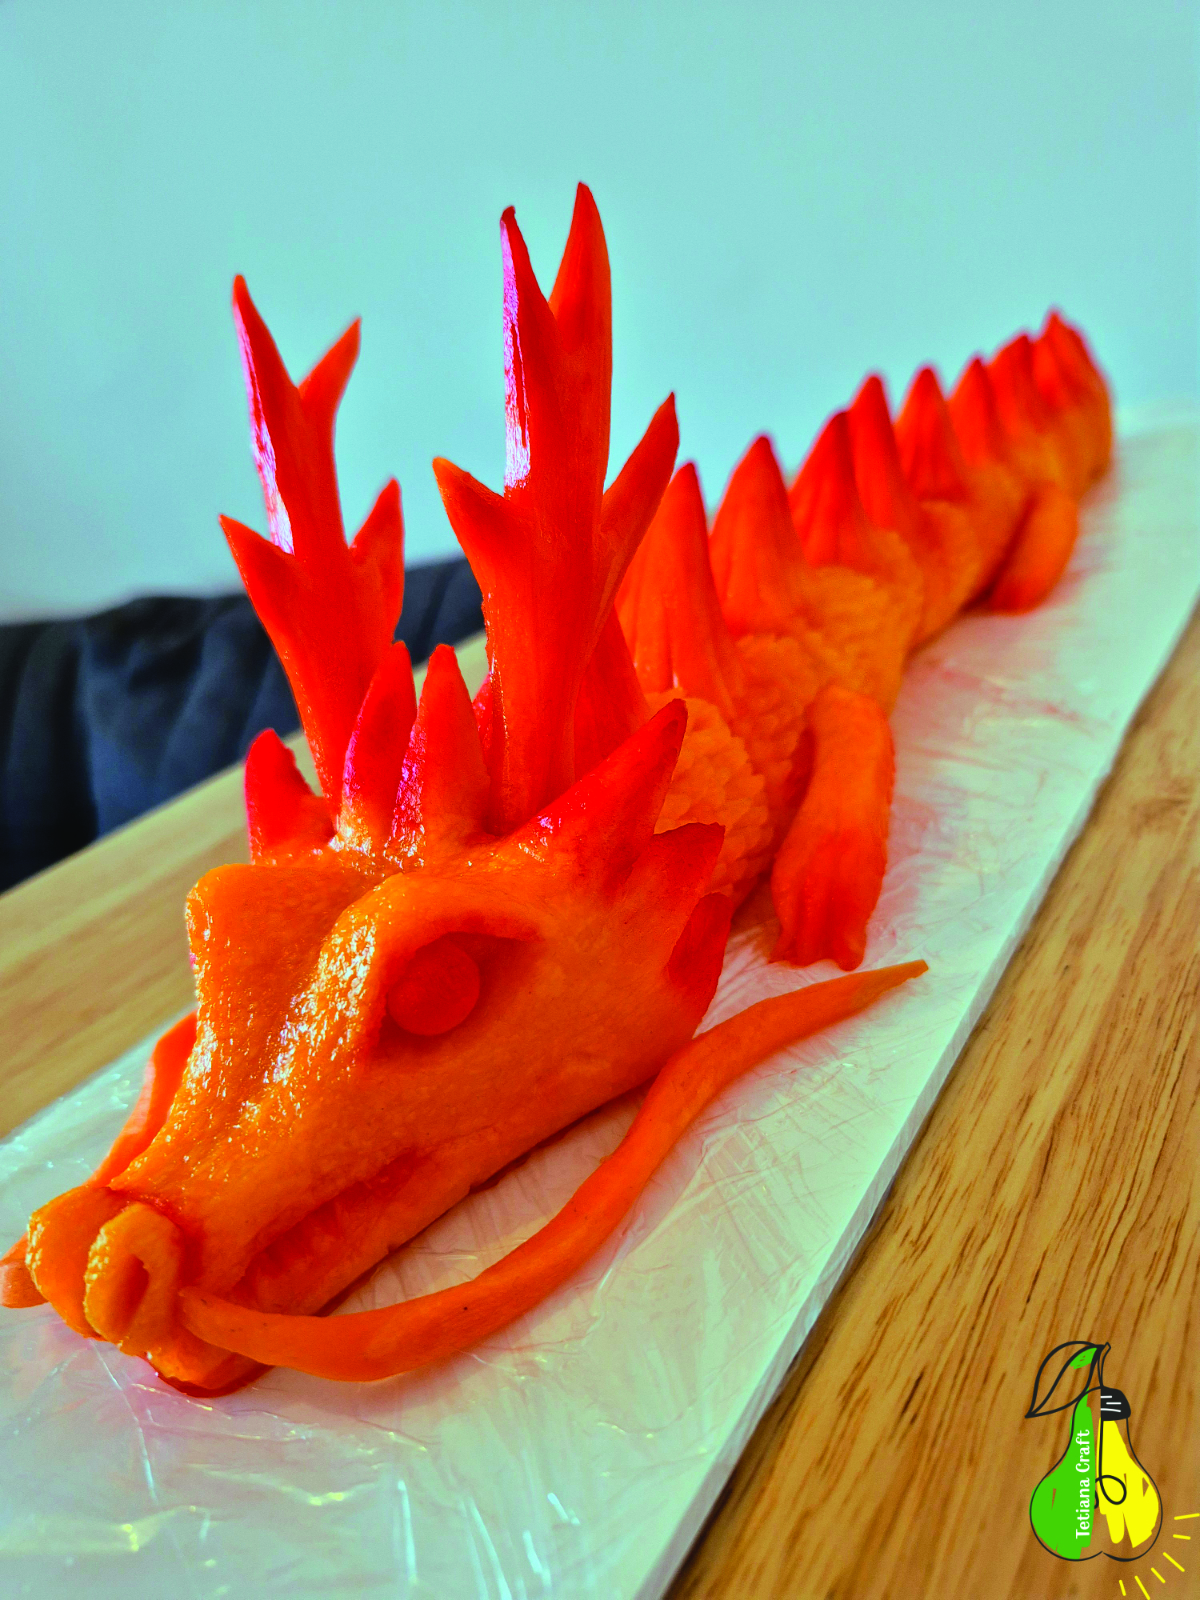
The Grand Finale: Adding Color and Shine
To complete the experiment, I decided to give my dragon some vibrant accents. I chose a bold red food coloring, focusing only on the protruding parts to create a dynamic look.

The Painting Process:
First, I patted each segment dry with a paper towel to ensure the dye wouldn’t run. Instead of water, I dipped my brush in vodka to dilute the gel food coloring. Alcohol evaporates much faster than water, which prevents the squash from getting soggy and allows the pigment to set perfectly.
The Finishing Glaze:
Once the painting was done, I applied a thin layer of vegetable glycerin along the entire length of the dragon. Glycerin acts as a protective barrier and gives the piece a beautiful, glossy finish. I wrapped it tightly in plastic wrap and let it rest in the refrigerator overnight.
The next morning, I applied one final “shielding” coat of glycerin to lock in the moisture. Below, you can see the final result of all my hard work!
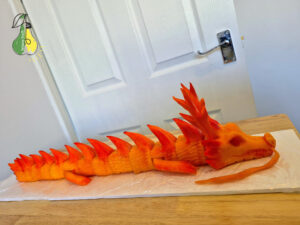


Conclusion: The Final Reveal
I feel a mix of exhaustion and great pride looking back at this journey. This guide turned out to be quite extensive, but carving a creature as complex as a Chinese Dragon simply cannot be described in a few words. There are too many technical nuances—from structural engineering to chemical preservation—that make the difference between a project that fails and one that succeeds. This was a grand experiment for me.
Thank you for following along with this process. I hope my experience inspires you to look at a simple butternut squash and see the mythical potential hidden inside!