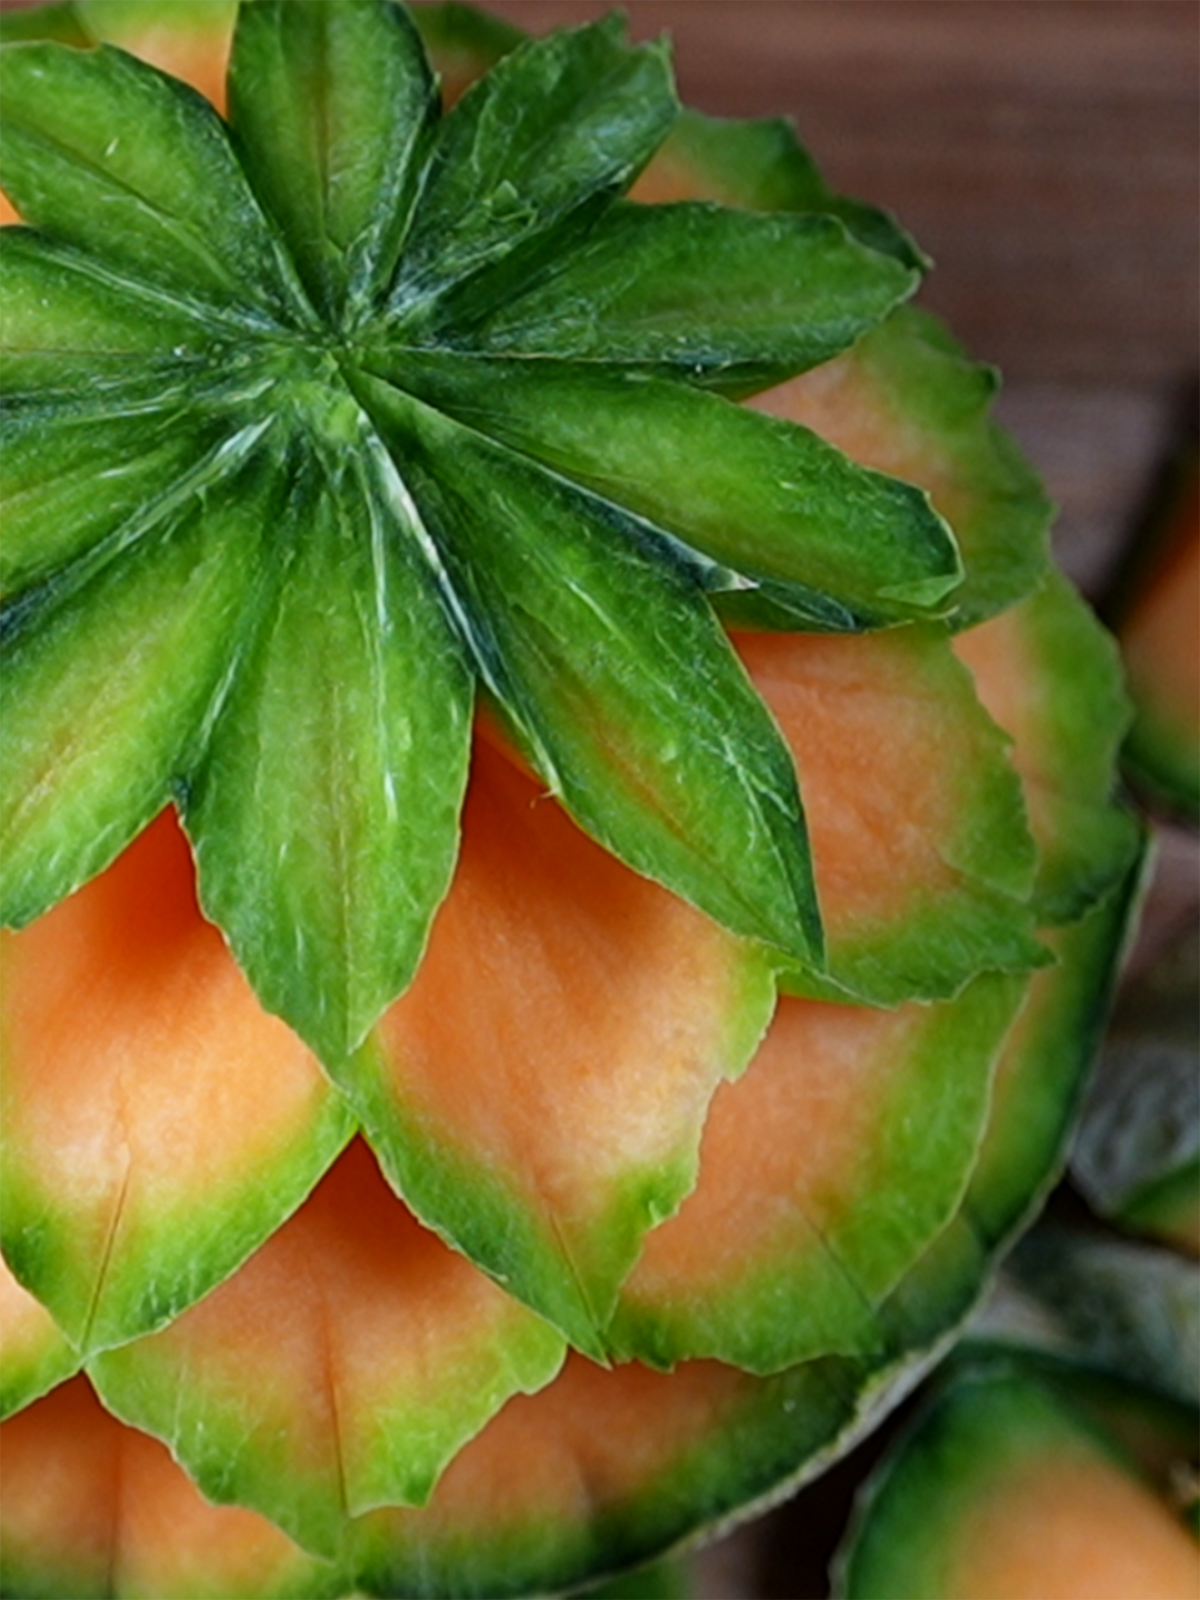
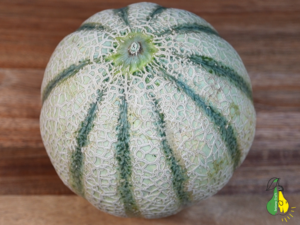
Why Cantaloupe is Best for Melon Carving
Melons are a fantastic canvas for food art, but cantaloupe is truly the best variety for carving.
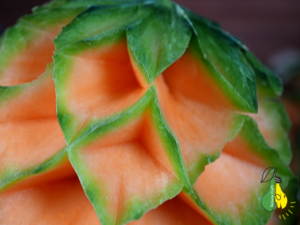
What makes it so special is its unique natural color layers: it features a textured tan rind, a vibrant green layer just underneath, and a rich orange flesh at the center. This natural color contrast creates a beautiful, striking 3D effect as you carve into the fruit.
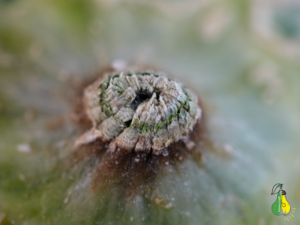
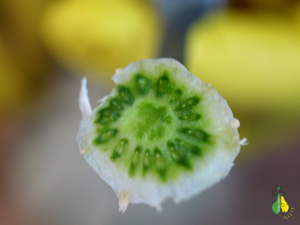
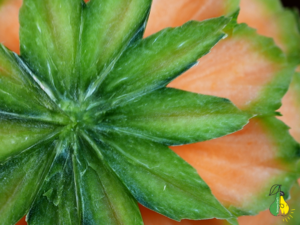
Macro Perspective: As a fan of macro photography, I couldn’t resist capturing this close-up shot of the melon stem. The natural geometric patterns are just beautiful!
The Essential Tool: Choosing the Right Carving Knife
To achieve precise, clean cuts, you need the right tool. For this project, I used a professional Thai-style carving knife (often called a bird’s beak knife).
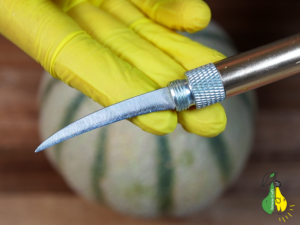
Its signature thin, curved blade is flexible yet incredibly sharp, allowing you to easily glide through the rind, cut intricate geometric lines, and effortlessly carve smooth undercuts.
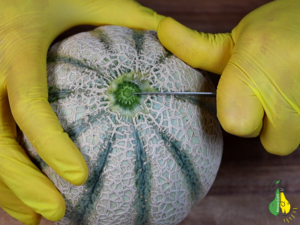
Step 1: Preparing the Base and Center
Before carving the design, you need to prepare the top of the melon. Carefully slice off the stem area to create a perfectly flat and clean surface.
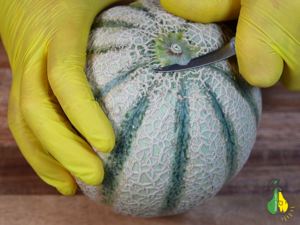
This flat center acts as the focal point for your pattern, helping you keep the upcoming petals balanced and symmetrical.

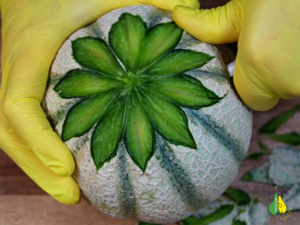
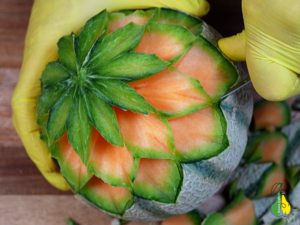
Step 2: Carving the First Row of Petals
Now, let’s start shaping the flower. Begin by cutting out your first petal, starting from the flat center and moving outwards.
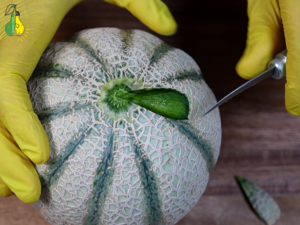
Continue carving individual petals one by one, keeping them symmetrical. Use the natural green stripes of the cantaloupe as a guide to ensure even spacing. Repeat this around the center until a complete flower pattern emerges on the surface.
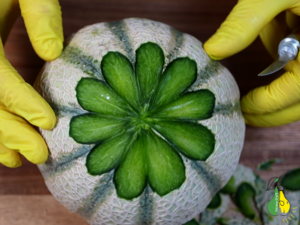
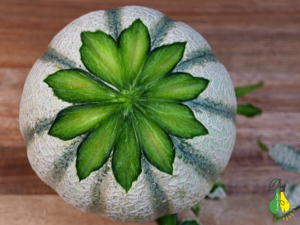
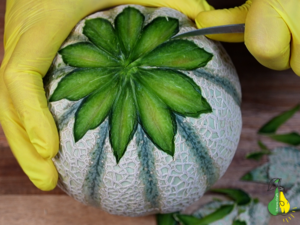
Step 3: Sharpening the Petal Tips
Once the basic outline of the flower is ready, it’s time to refine the details. Carefully trim the outer edges of each petal to form a sharp, pointed tip.
Angling your blade slightly inward during this process gives the edges a crisp, defined look and beautifully emphasizes the green layer of the rind.
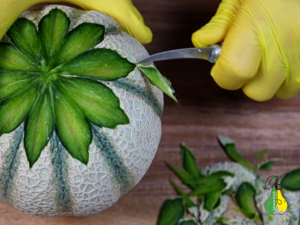
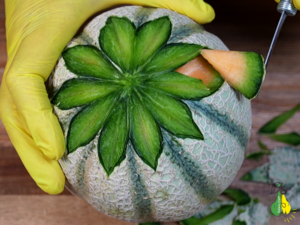
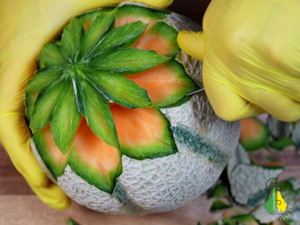
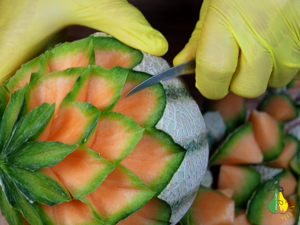
Step 4: Making Deep Outlining Cuts
To prepare the design for a 3D effect, you need to separate the flower from the surrounding rind. Carefully trace along the outer edges of each sharpened petal, making a deep, precise cut into the melon.
Tip: Keep your hand steady and hold the knife at a consistent angle. These deep cuts will serve as the guide borders for removing the excess skin in the next step.
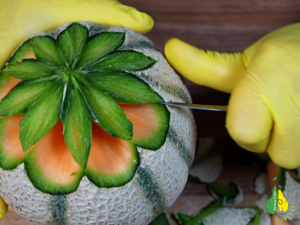
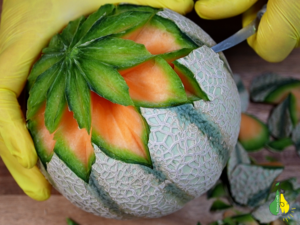
Step 5: Revealing the 3D Depth
This is where the magic happens. Slide your knife underneath the outer edge of the petals at a shallow angle.
Carefully slice away the excess rind between and beneath the petals. As you remove these pieces, the vibrant orange flesh of the cantaloupe is revealed, creating a stunning color contrast.
This undercutting technique lifts the green petals visually, giving your melon flower a beautiful, deep 3D effect.
Step 6: Shaping the Outer Layer of Petals
Now, move to the outer layer. Repeat the sharpening technique by carving pointed tips for the lower petals.
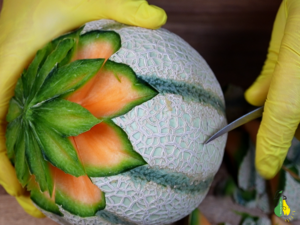
To make the design look natural and dynamic, position these new petals in a staggered, checkerboard pattern between the petals of the first row. Trim the edges carefully to keep the lines clean and crisp.
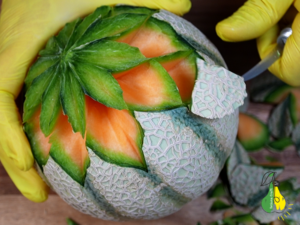
Step 7: Outlining the Outer Layer
Just like with the first row, you need to define the borders of this new layer. Trace along the outer edges of the second row of petals, making deep, controlled cuts into the rind.
These cuts will separate the new petals from the remaining skin and set up the next round of undercutting to continue building the flower’s depth.
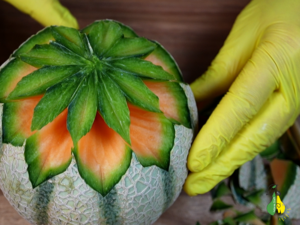
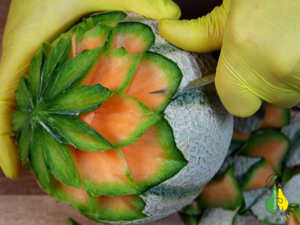
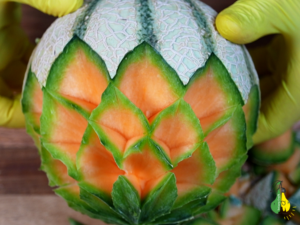
Step 8: Creating the Second Layer of Depth
Now, perform another undercut beneath this second layer of petals. Slide the blade under the newly carved edges at a shallow angle to remove the surrounding pieces of rind.
Removing this layer further extends the vivid orange backdrop, making the green geometric petals pop out even more and adding incredible dimension to the flower.
Step 9: Refining the Third Petal Layer
To complete the full flower pattern, repeat the sharpening technique on the outermost layer. Carefully trim and shape the new petals to give them clean, pointed tips.
Maintaining consistency with the previous layers helps blend the rows seamlessly, adding incredible fullness to the final 3D design.

Step 10: Final Outlining and Undercutting
Finish the third and final row by mimicking the exact same outline and undercutting motions used in the previous steps.
Carefully slide your knife beneath the outermost layer to remove the last sections of rind. This final cut fully opens up the entire design, completing your multi-layered geometric blossom.
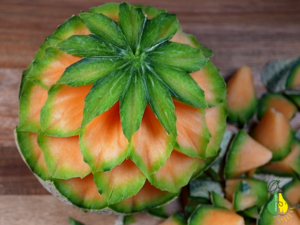
The Finished Masterpiece
Here is the final result! Your stunning, multi-layered cantaloupe flower is complete and ready to amaze your guests at any table or dinner party.
Watch the Video Tutorials
If you want to see the entire carving process in motion, I’ve got you covered:
-
Detailed Step-by-Step Guide: Watch the full video tutorial embedded below or directly on YouTube.
- Short on Time? For a quick, fast-paced overview of the process, check out the short version on TikTok.
@tetiana.craft Satisfying Cantaloupe Carving 🍈✨ Would you try this? 🌸 #fruitcarving #cantaloupe #satisfying #asmr #foodart