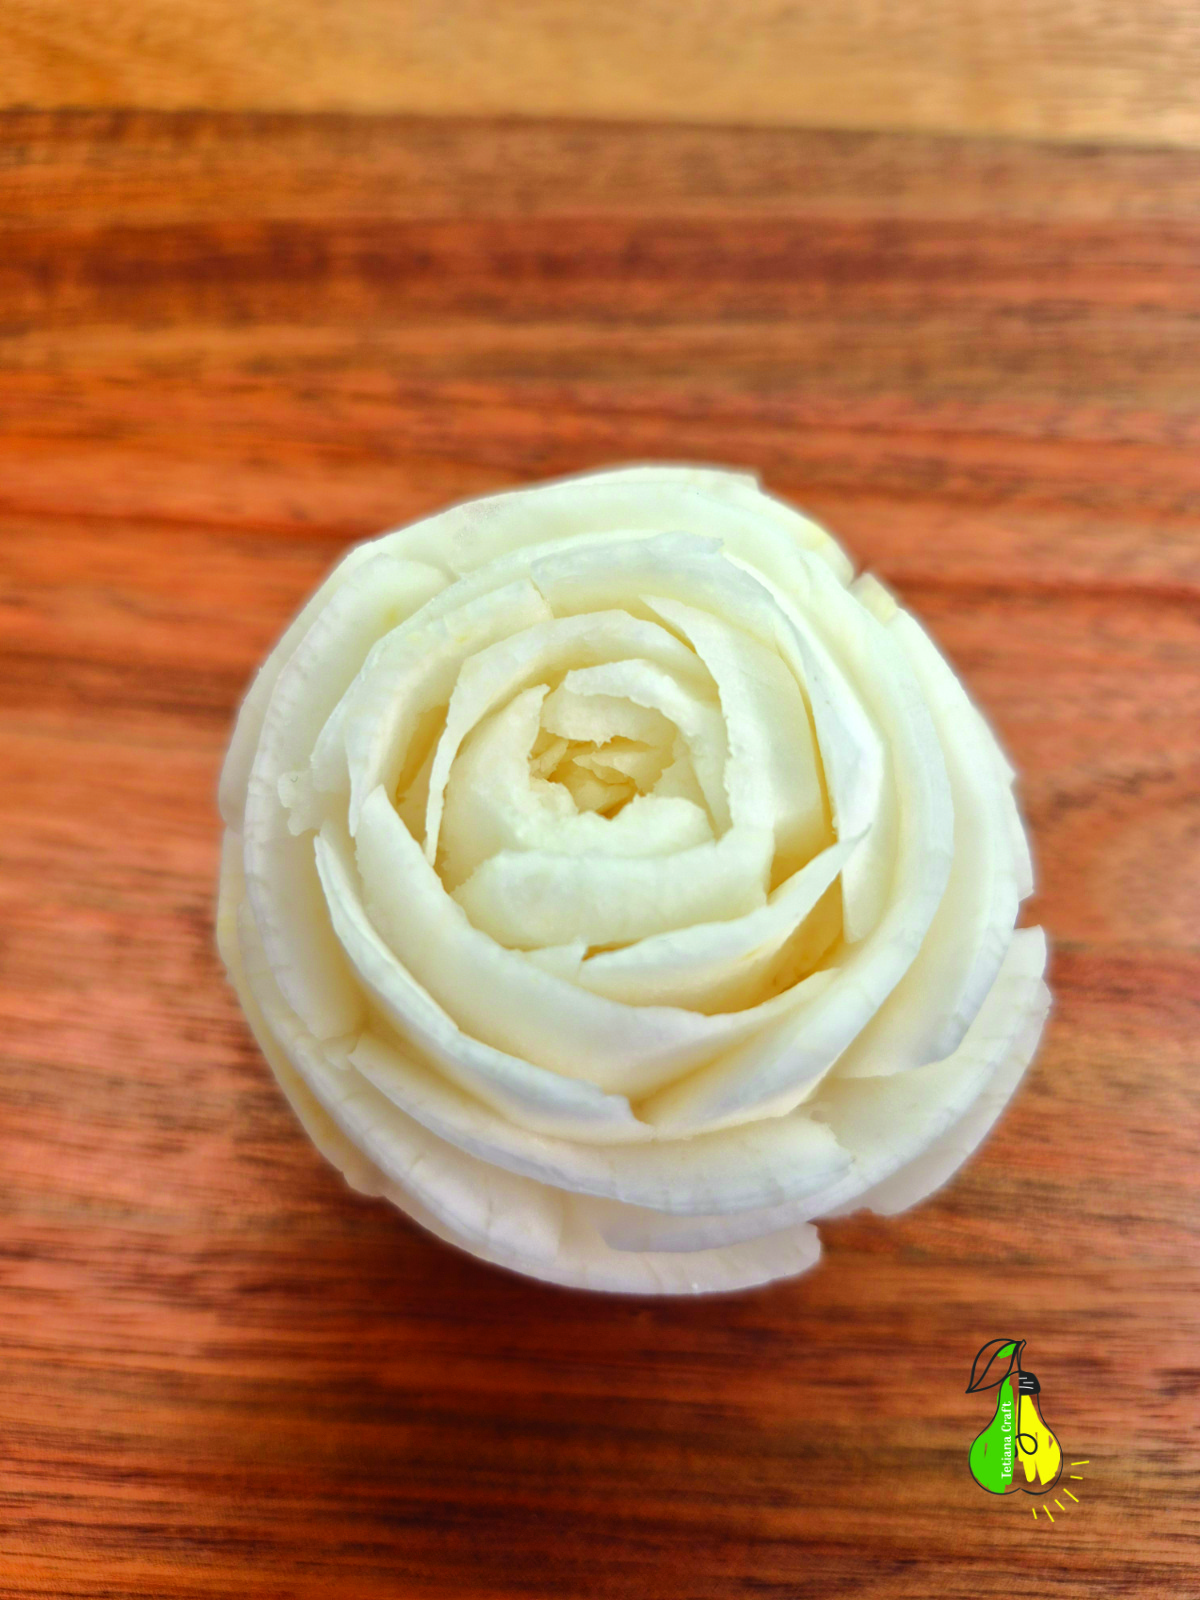
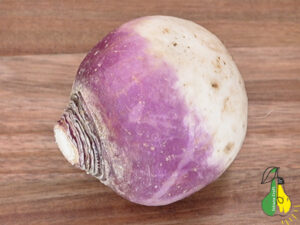
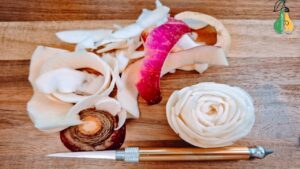
Food carving is a fantastic way to elevate your dish presentation, and this beautiful rose is much easier to make than it looks. Today, I will be using a purple-top turnip.
 What You Need:
-
1 fresh turnip (smooth skin works best)
-
A vegetable peeler
-
A small kitchen knife / paring knife
-
A sharp carving knife
-
A bowl of cold water (to keep the rose fresh)
Pro Tip: This quick version takes about 13 minutes because I am keeping the petals relatively thick. The rule is simple: the thinner you carve the petals, the more realistic the rose will look, but it will also take more time. This simple method is perfect for beginners!
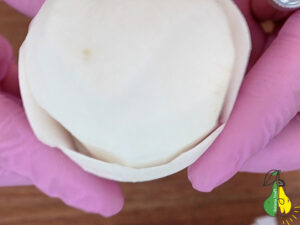
Step 1: Preparing the Base
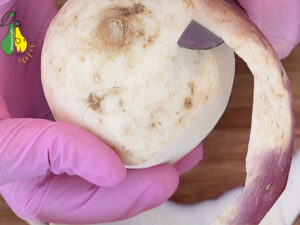
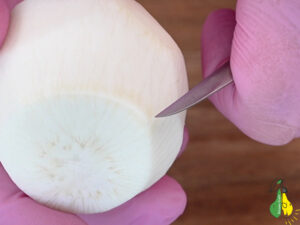
First, I cut off the top and bottom of the turnip to create a flat, stable surface.
To speed up the process, I peeled the thick outer skin using a regular small kitchen knife instead of my carving knife.
Carving Tip: Peeling the tough outer skin with a standard kitchen knife helps keep your specialized carving knife sharp for much longer. Save the delicate blade for the intricate details!
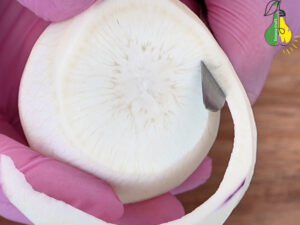
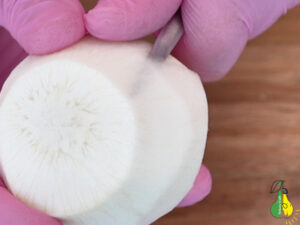
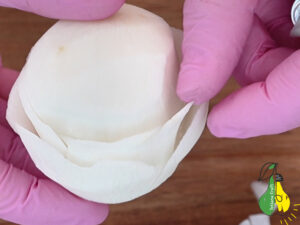
Step 2: Smoothing the Surface
After peeling the turnip with a knife, the surface can be a bit uneven. To fix this, I use a vegetable peeler to smooth out the edges and create a perfectly rounded shape.
A smooth, even base makes it much easier to carve clean, symmetrical petals later on!
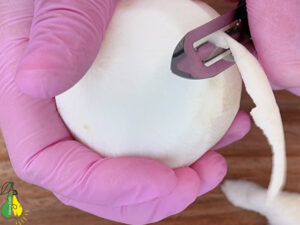
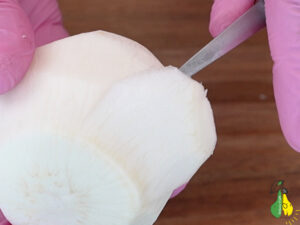
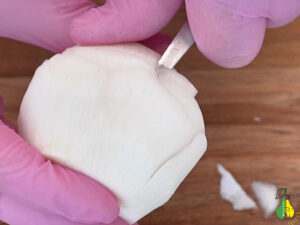
Step 3: Carving the First Layer of Petals
Now, it is time to switch to the carving knife and start shaping the flower.
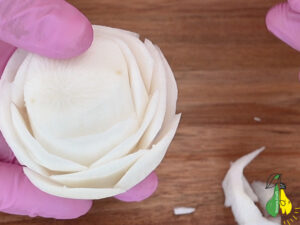
Carefully slide your knife into the side of the turnip at a slight angle to carve out the first petal. The number of petals you make in a single row depends entirely on the size of your turnip. For the outer (bottom) layers, I prefer to carve 5 petals to give the rose a balanced and full look.
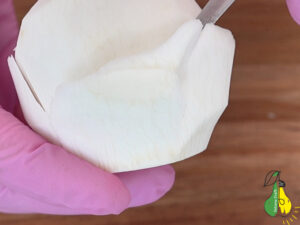
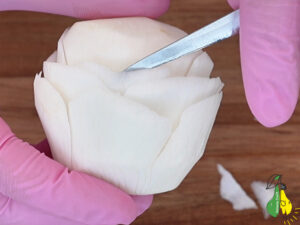
Step 4: Making the Petals Pop (Removing the Excess Flesh)
After carving a row of petals, you must cut away the excess flesh from underneath them.
Using a thin carving knife, gently slice beneath the petals to remove the trim. This creates a deep groove, making the petals stand out and look realistic.
Important Note: Remove more flesh from the bottom (outer) layers than from the top (inner) layers. This naturally tapers the turnip and gives you the perfect cone shape for the next rows.

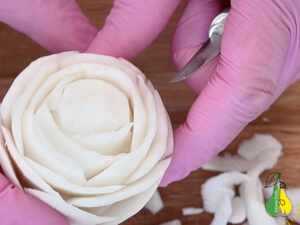
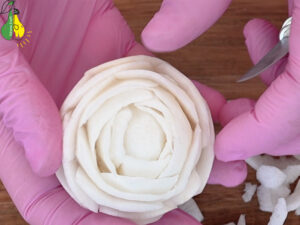
Step 5: Continuing with More Rows (Chessboard Technique)
Now, I repeat the entire process for the second and third rows. This involves carving the petals and removing the excess flesh, just like before.
The key to a beautiful, realistic rose is the placement of the next layers. It is crucial to carve each new row in a staggered, or chessboard pattern. This means placing the petals of the new row between the gaps of the petals from the previous row.
This simple technique makes the rose look balanced and completely natural.
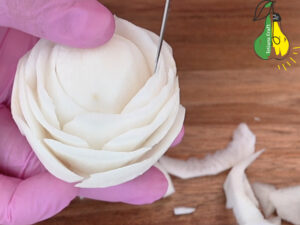
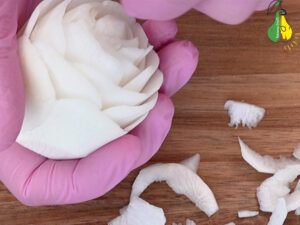
Step 6: Shaping the Core for the Bud
After completing the fourth row of petals, it is time to prepare the center of the turnip for the final bud.
Using your carving knife, start cutting deeper around the central core to make it smaller and more rounded. This center dome should be nicely tapered and slightly recessed, yet still distinct, providing the perfect foundation for the delicate inner petals.
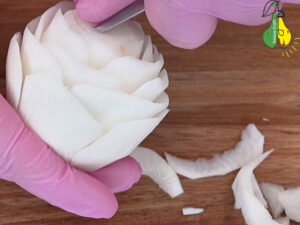
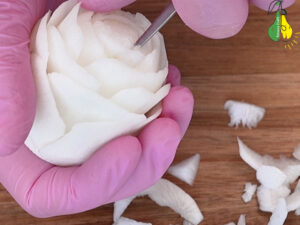
Step 7: Carving the Delicate Center Bud
As you approach the very center of the rose, the carving requires a lighter touch.
For the inner rows, make the petals much thinner and smaller. Since the space is tight, you only need to remove a tiny amount of flesh between these central loops. Keep spiraling inward until you reach the absolute center, creating a tightly closed, natural bud.
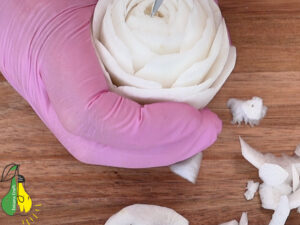
Step 8: Setting the Rose (The Cold Water Trick)
Once you finish carving, place your turnip rose into a bowl of cold water for a few minutes.
This is a magical step: the cold water crisps up the turnip, allows the petals to open up slightly, and preserves its freshness. It also highlights that gorgeous natural color gradient on the outer edges.
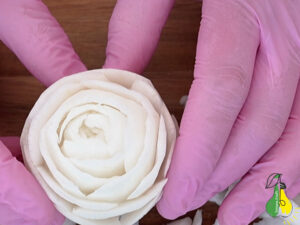

The Final Result!
And there you have it! A stunning, elegant rose made in just about 13 minutes. It is the perfect, budget-friendly way to amaze your guests and turn a simple dinner into a fine-dining experience.
-
Watch the full tutorial: Check out my YouTube video “How to Make a Quick Turnip Rose (Simple Method)” to see the whole process in motion!
- Prefer short-form video? If you love quick and snappy videos, I also have a short version of this tutorial available on my TikTok!
@tetiana.craft Simple Turnip Rose #turniprose #satisfying #asmr #foodart #carving
Happy carving!