Hello everyone! I recently found some free time and decided to share an interesting idea with you. This article will be dedicated to sculpting a lion from plasticine (modeling clay).
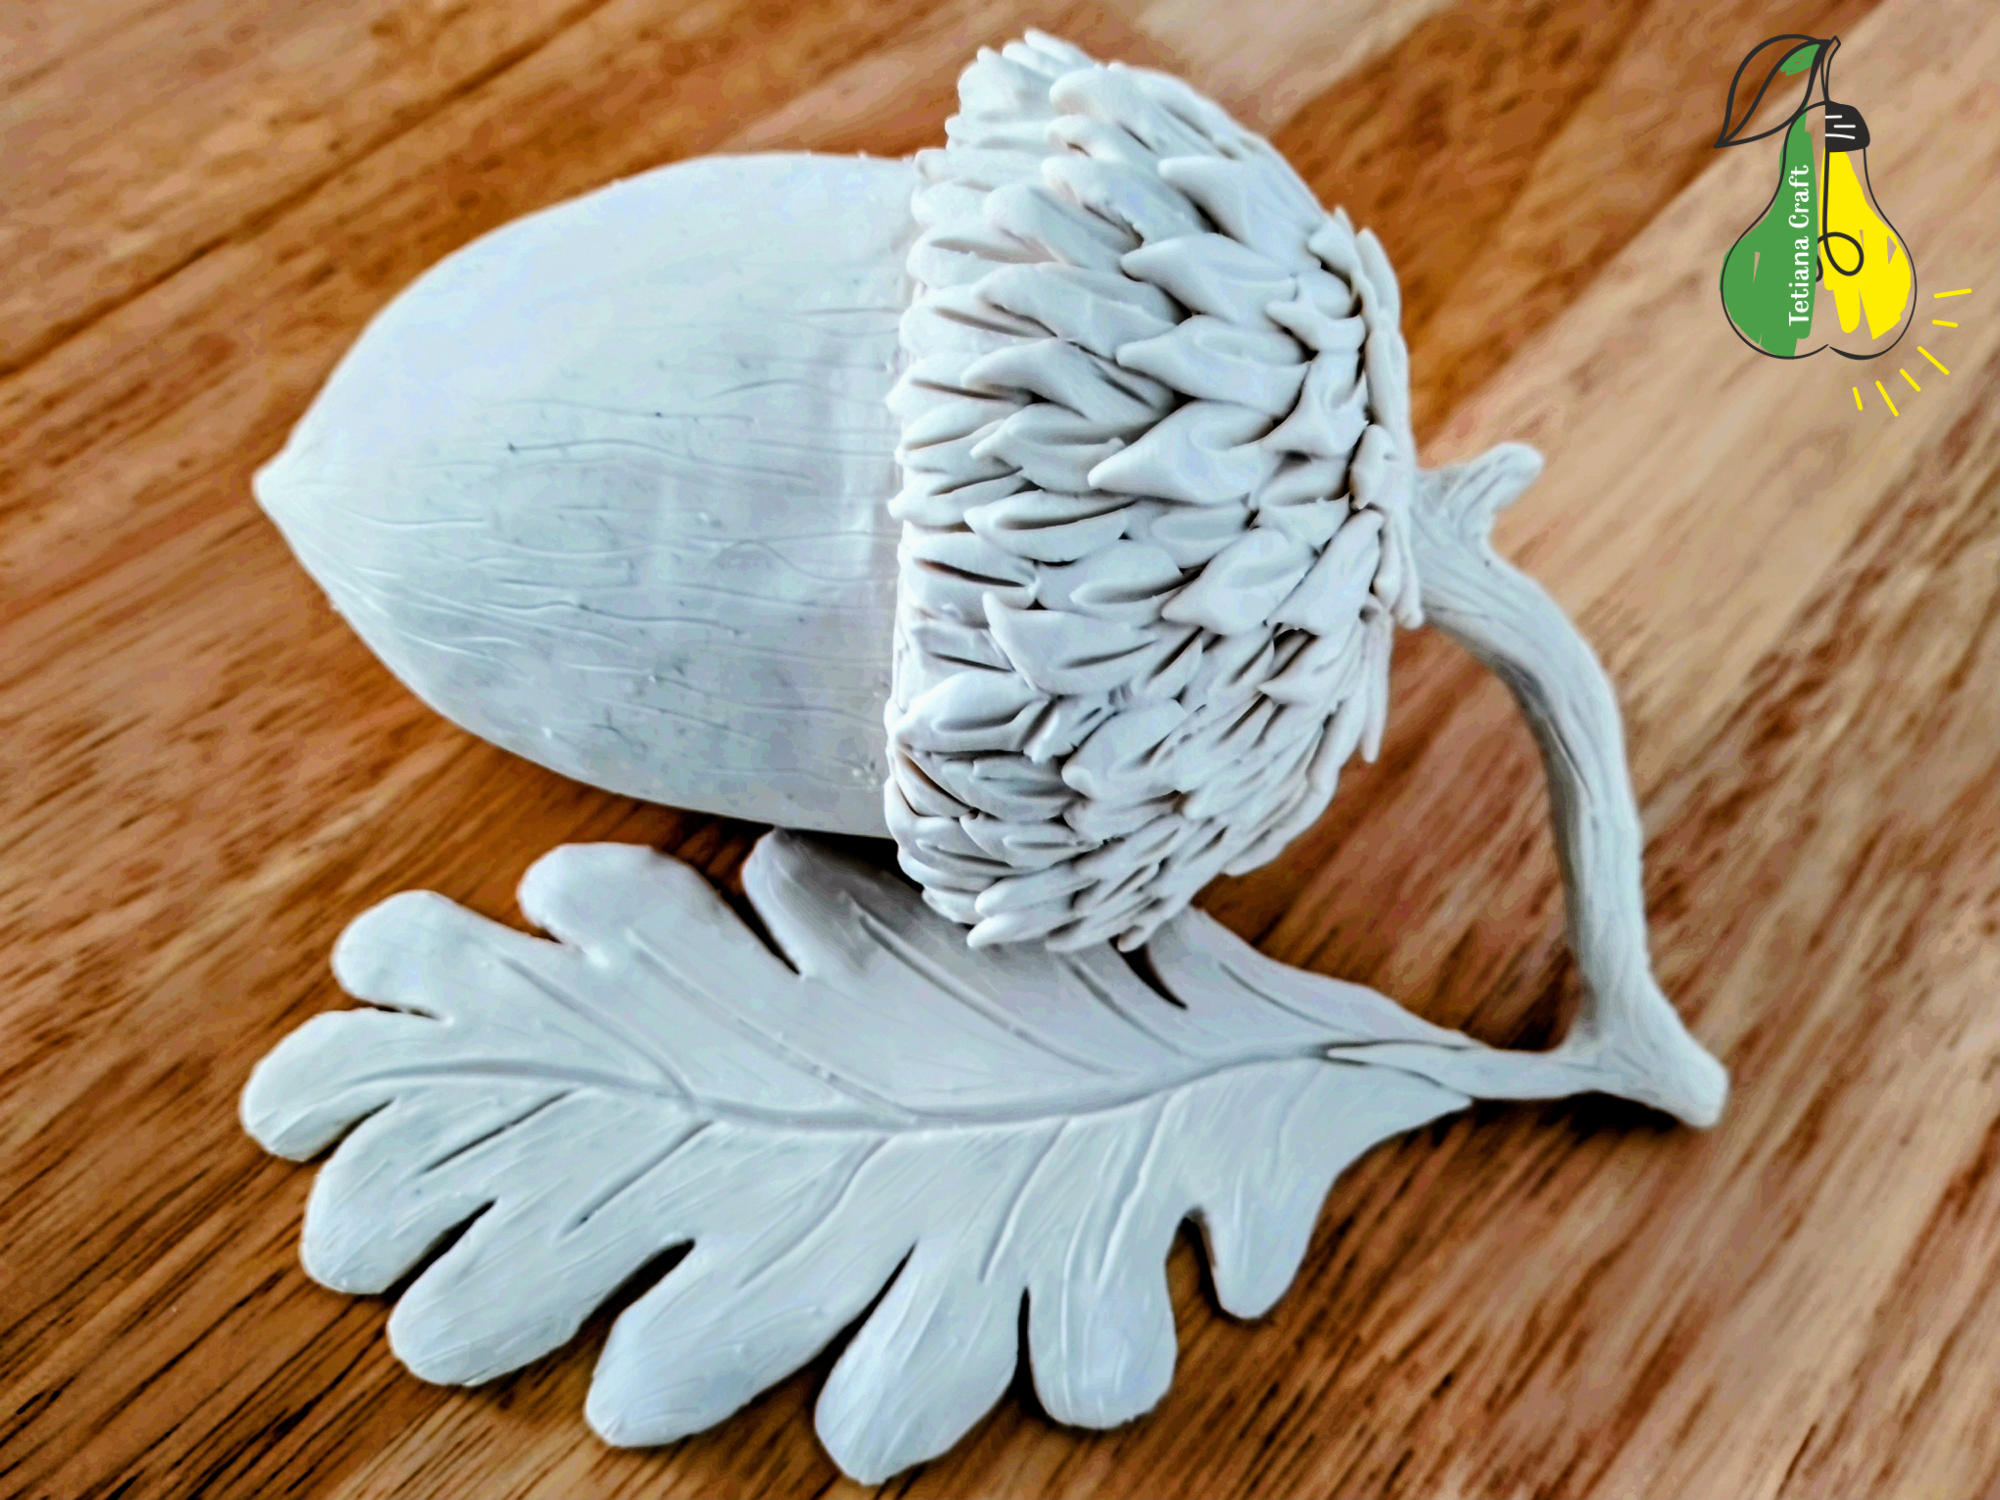
If you have read my previous articles, such as the one about the chocolate acorn, you already know that plasticine is an excellent material for creating unique chocolate figures. For those who are new to my work, here is a brief explanation: to create a custom chocolate piece, I first sculpt the design using sculpting plasticine. Then I use food-grade silicone to create a mold of the sculpture. Once the silicone mold is ready, it can be used with chocolate to produce multiple, unique copies that are entirely your own.
Challenges and Materials
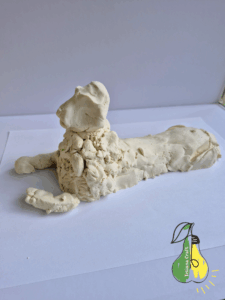
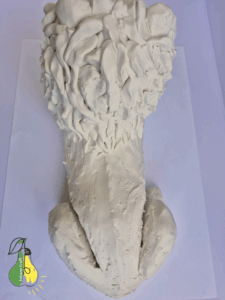
Sculpting the lion from plasticine turned out to be less easy than I initially thought! I am just an amateur and do not have professional training. Below is a look at the initial stage of the work on the lion.
You might notice that I inserted the remains of the plasticine acorn prototype into the core of the lion’s body. I did this in an effort to conserve materials. This was an earlier practice, but I have now decided to save all my prototypes, as creating them is time-consuming and they might be needed for future projects. Another option is to pour plaster into the silicone mold to create a copy, but I find this method to be less accurate and usually requires a lot of refinement afterward.
Working with Hard Plasticine
The specific sculpting plasticine I use is excellent for this work, particularly because it does not react with silicone, which can happen if the plasticine contains sulfur. However, this material has one drawback: it is quite stiff when cool.
To soften it, I first tried an inconvenient method: I would place a piece of plasticine on an upside-down lid over a container of hot water to warm it up.
Then, I remembered that I own a chocolate melting device. This proved to be the perfect solution! It uses low temperatures, and since the device came with three separate bowls, I designated one specifically for the plasticine. I made clear markings on this bowl to avoid any accidental mix-ups. The plasticine is now only softened within this designated bowl, and the main device remains clean. However, I still perform extra cleaning after each use to ensure even the smallest trace of plasticine doesn’t get onto the melting unit itself.

Beginning the Sculpture and Shaping the Form
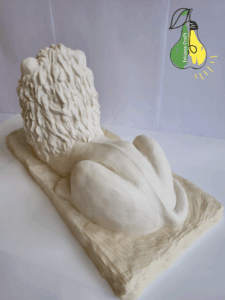
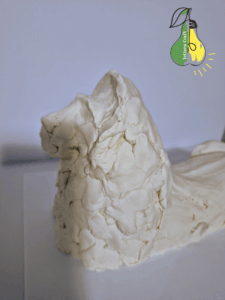
Returning to the process of sculpting the lion, I created the initial form quite simply, often adjusting the size as I worked. First, I established the basic, rough contours of the body. Next, I attached the legs and tail.
To refine the shape and ensure more accurate form, I printed several images of lions from the internet. I used these as a reference to try and replicate the proper proportions, while still ensuring the final piece remained unique and my own creation. You can see the photos of these transformations below.
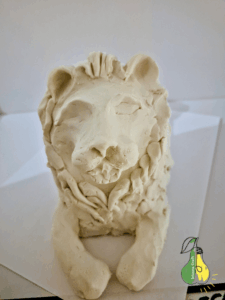

Detailing the Face: The Eyes
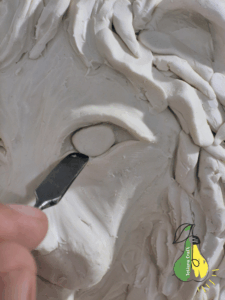
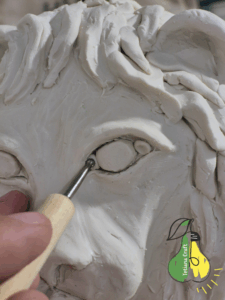
Forming the eyes proved to be the most difficult task for me, and I had to reshape them many times.
Working with plasticine is very convenient because, while it is firm when cool, you can easily correct mistakes at any stage of the work. To begin the eyes, I first created a recession (or socket) for the eyeball. Then, I inserted a small, oval-shaped ball of plasticine to serve as the eyeball itself.
Next, I rolled a thin strip of plasticine and used it to form the lower eyelid.
Using a thin tool that resembles a small, narrow spatula (or trowel), I then smoothed the lower eyelid to make it even and neat.
I just realized that I forgot to show you the tools I used for this project! These are standard clay sculpting tools, and I found them to be incredibly useful for working with plasticine as well. You can see a photo of them below.

Returning to the lion’s eye: once the lower eyelid was smoothed, I noticed that the eyeball was protruding too much. To fix this, I added a small amount of plasticine around its edges to better integrate it with the surrounding facial structure.
After adding the extra plasticine, I then worked to smooth this area and eliminate any noticeable seams or bumps.
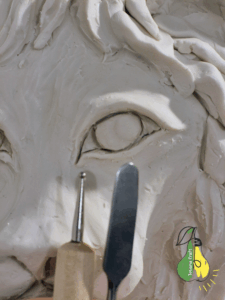
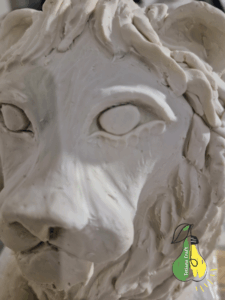
The area looked much better now, but to fully complete the eye, I still needed to add the upper eyelid. Here is the final result of the detailed eye area.
Final Details and Conclusion
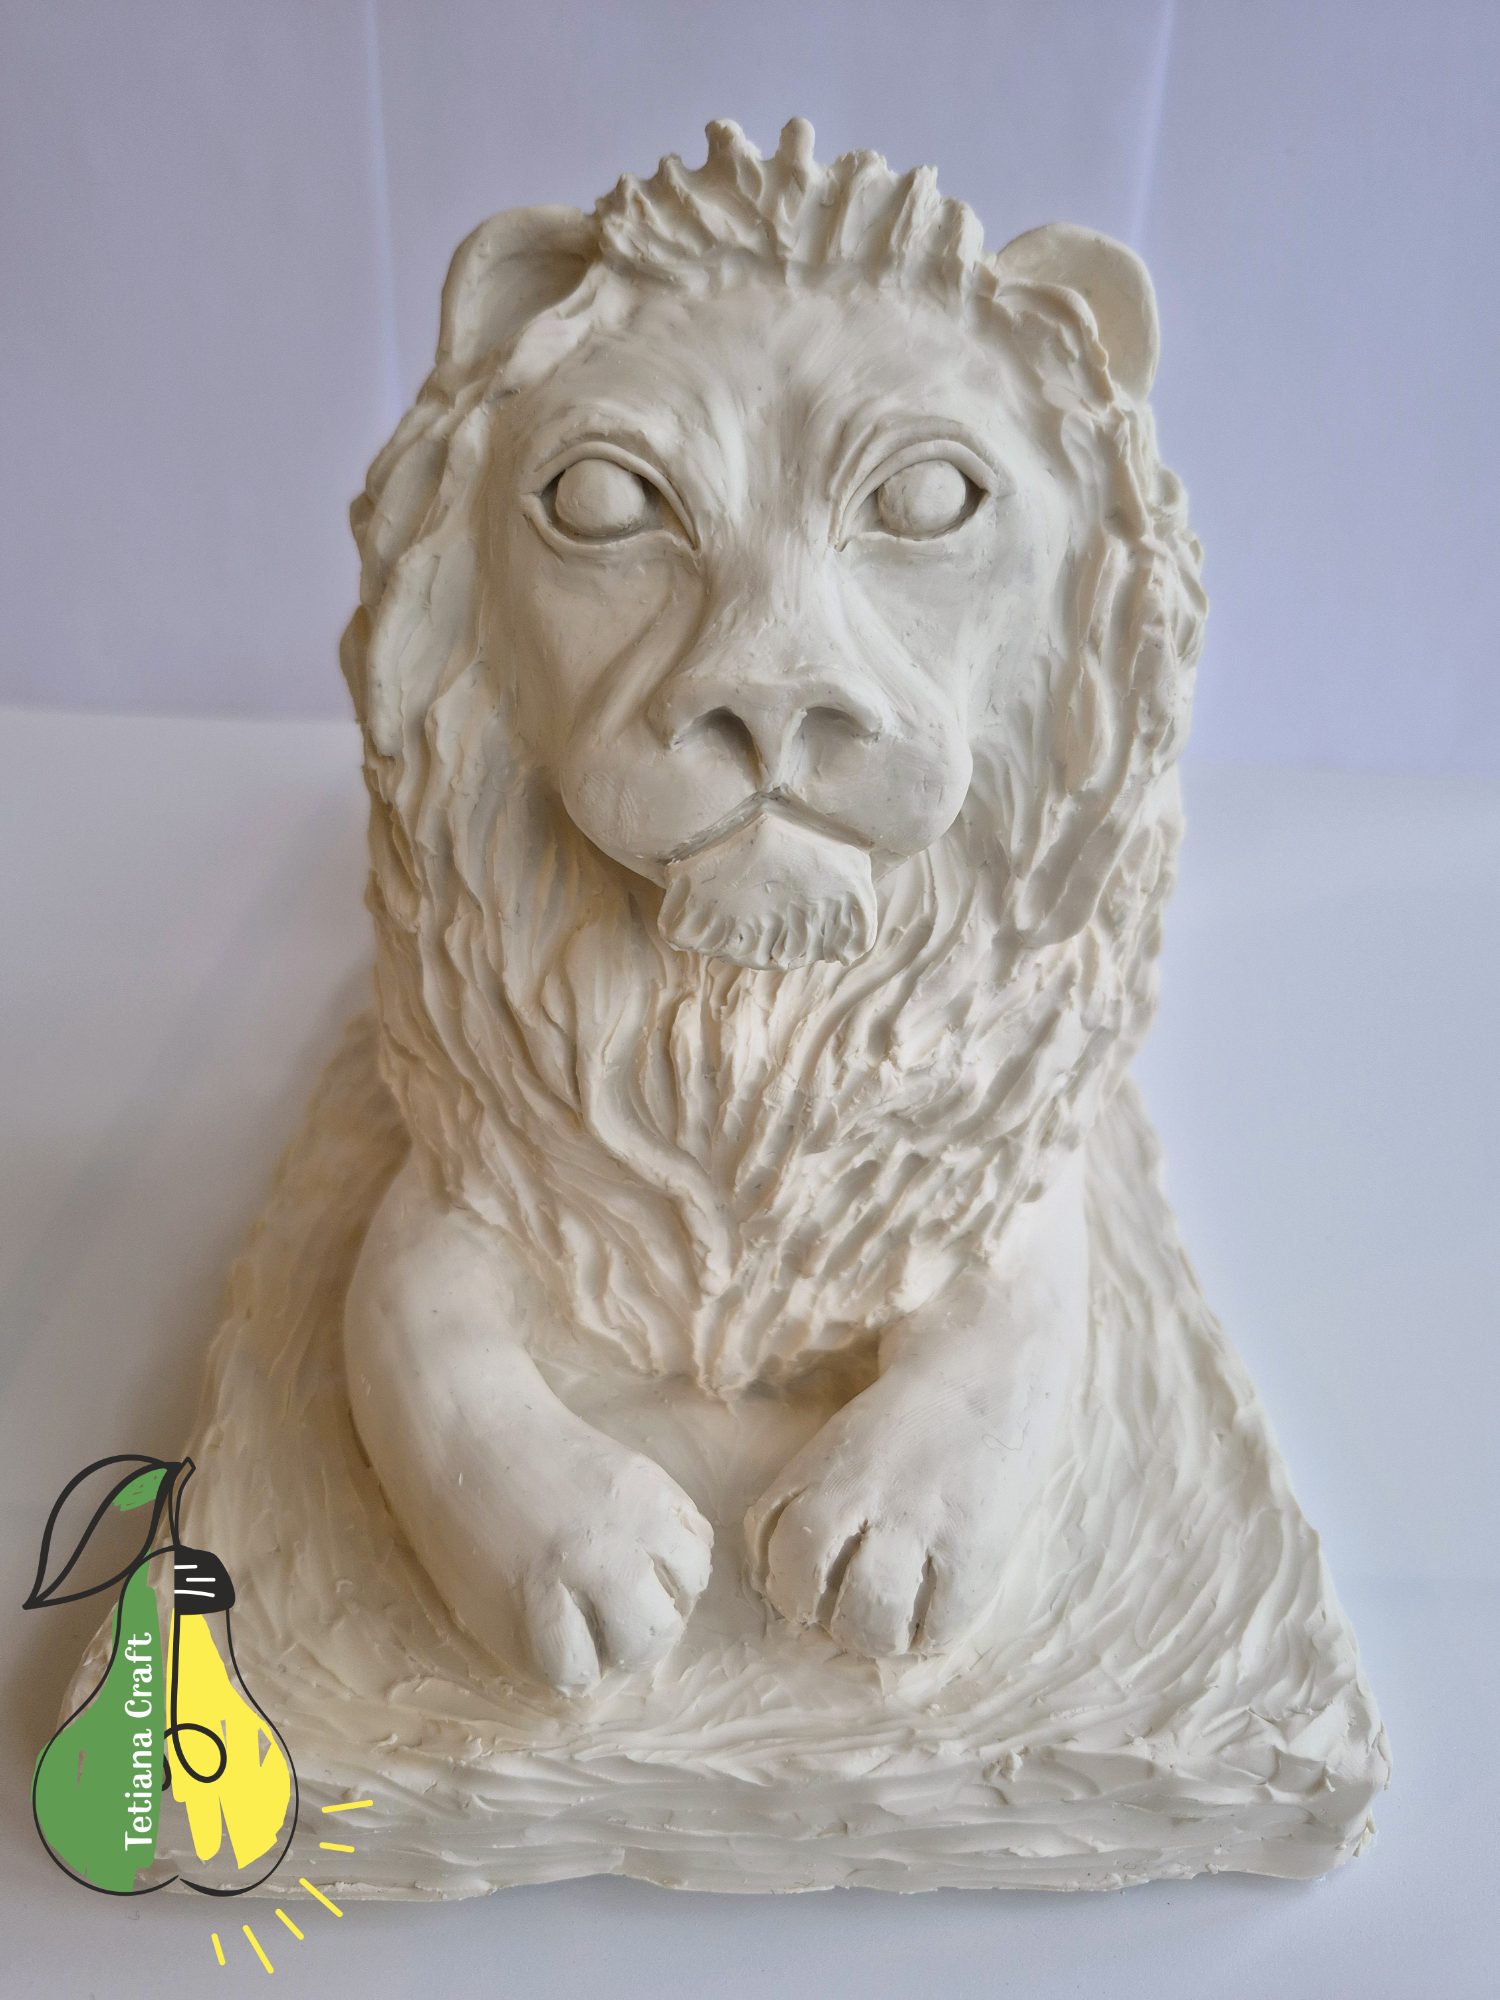
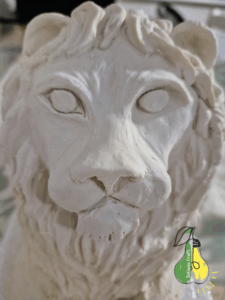
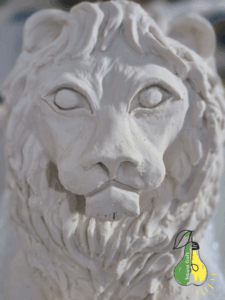
Once the eyes were complete, I moved on to detailing the nose and other parts of the body. This is the final and most rewarding part of the process, as the finished result begins to emerge.
I also decided to slightly raise the forehead and remove the forelock (fringe). Fortunately, plasticine allows you to make changes at any stage of the work!
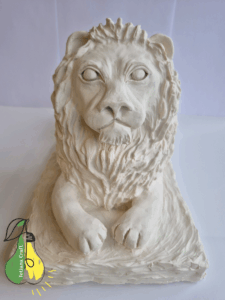
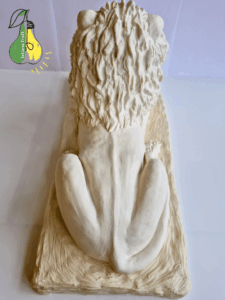
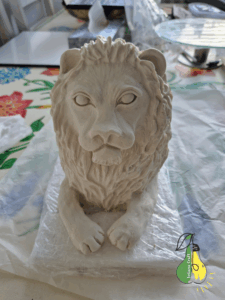
I am now ready to show you the final result! Sculpting this lion took me a little over a month; I am often limited in free time due to my job and additional volunteer work. I am very happy with the final outcome, and I hope you enjoyed it as well.
See you soon!