In my previous article, I shared the process of creating a custom silicone mold entirely by hand. That was the technical challenge—the preparation. If you haven’t seen this article, you can read about it by clicking on the link.
Now, it’s time for the delicious part: bringing that mold to life. This article details the transformation of that unique silicone creation into a magnificent, edible lion cake. Get ready for some serious baking!
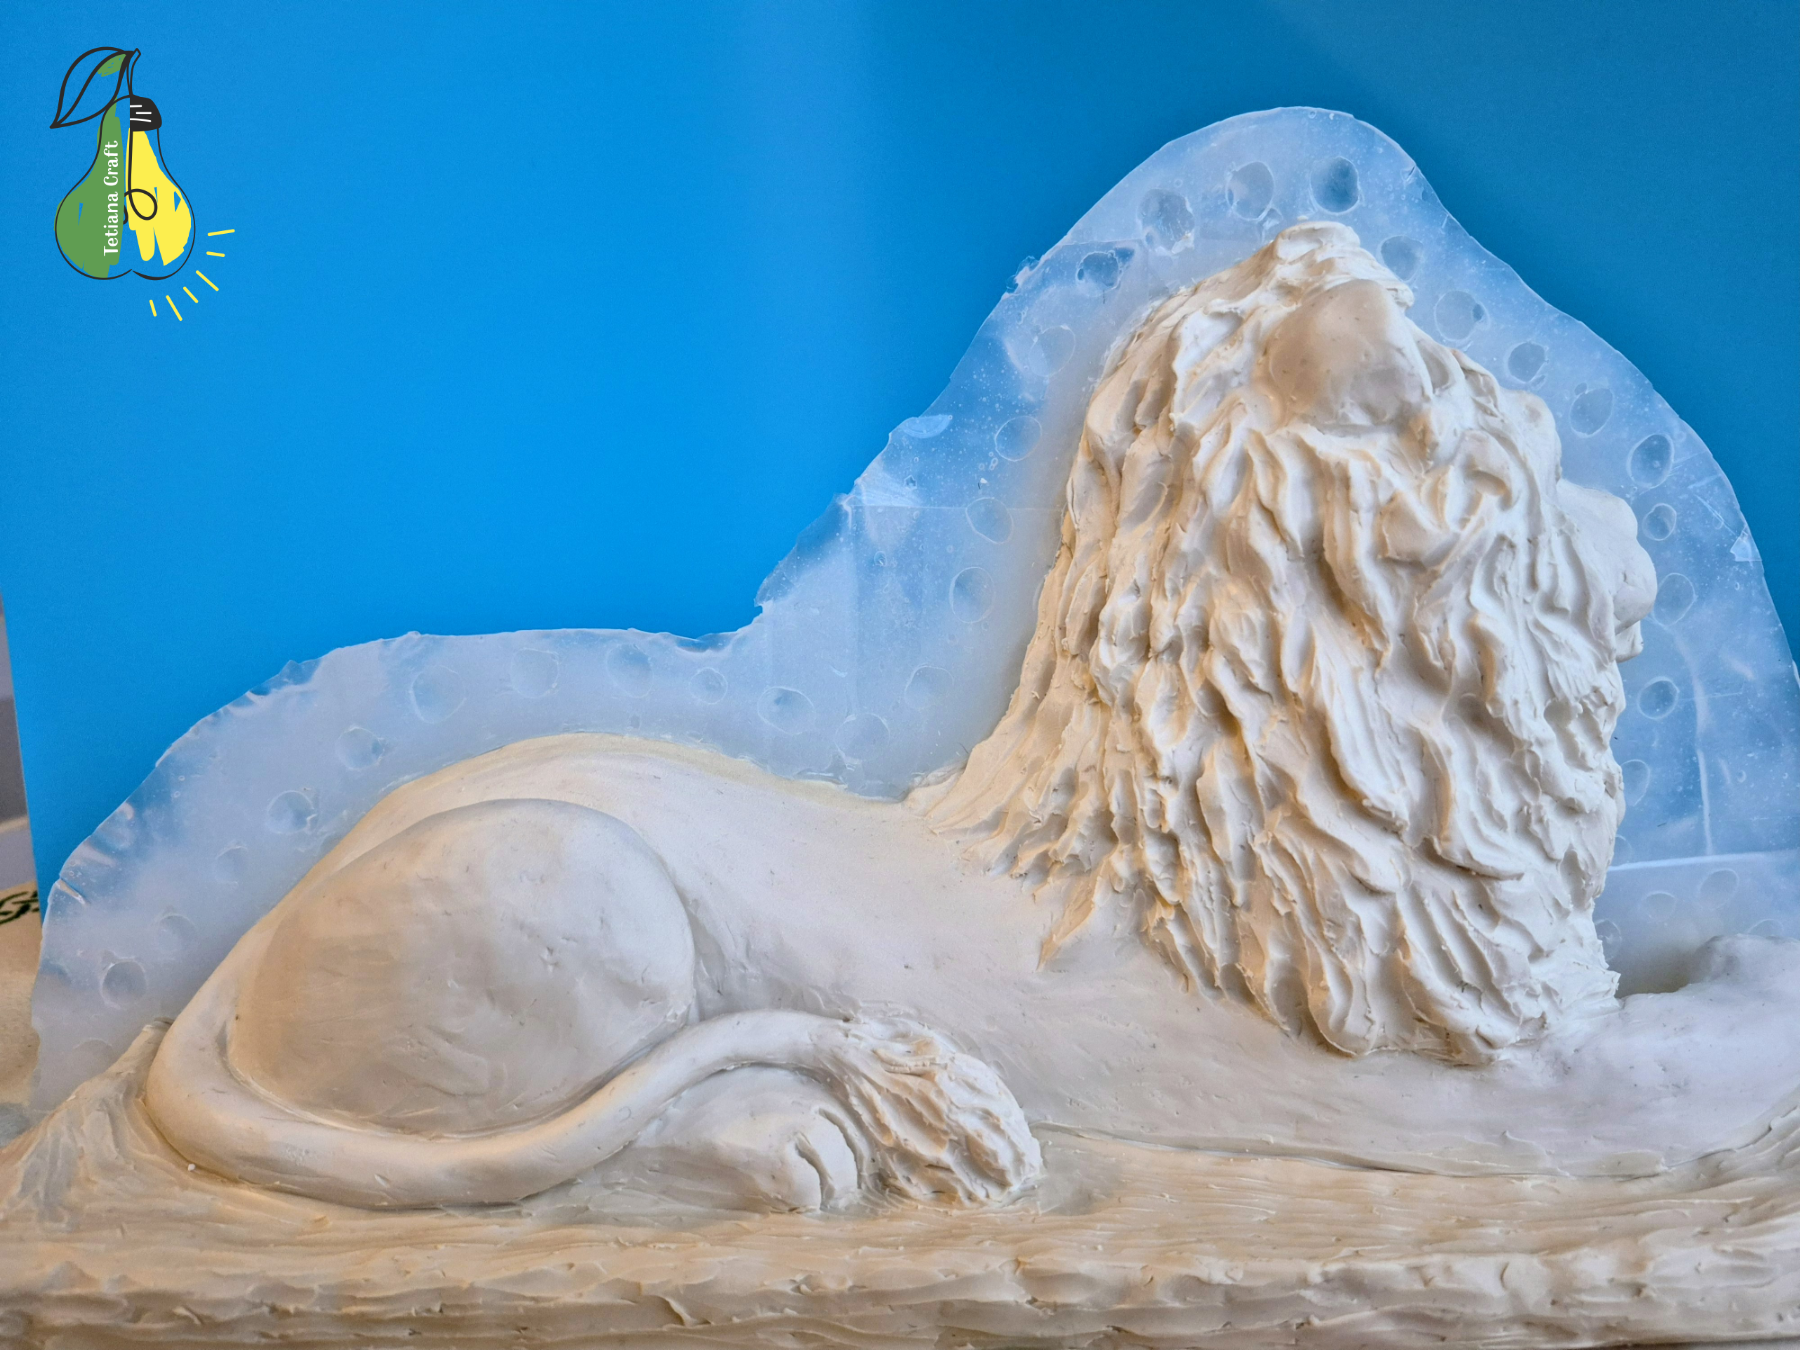
Assembling the Custom Silicone Mold
Before working with the silicone mold, even though it is stored in a clean, dry place, it needs to be assembled and thoroughly prepared.
First, I wash the mold with warm water and wipe it completely dry using paper towels. Thorough cleaning is essential to ensure no dust or debris compromises the cake.
Next, I place the outer casing (the support jacket) over the silicone form. This jacket was specifically created using a 3D pen to provide necessary rigidity.
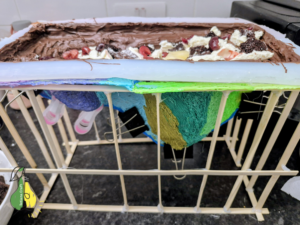
All the mold parts are secured together using binder clips and clothespins. Once the pieces are tightly fastened, I place the entire mold assembly into a bamboo stick frame (the outer framework).
I check carefully to ensure all seams and joins are perfectly aligned and tightly sealed. Once confirmed, the mold is ready for work.
Creating the Chocolate Shell
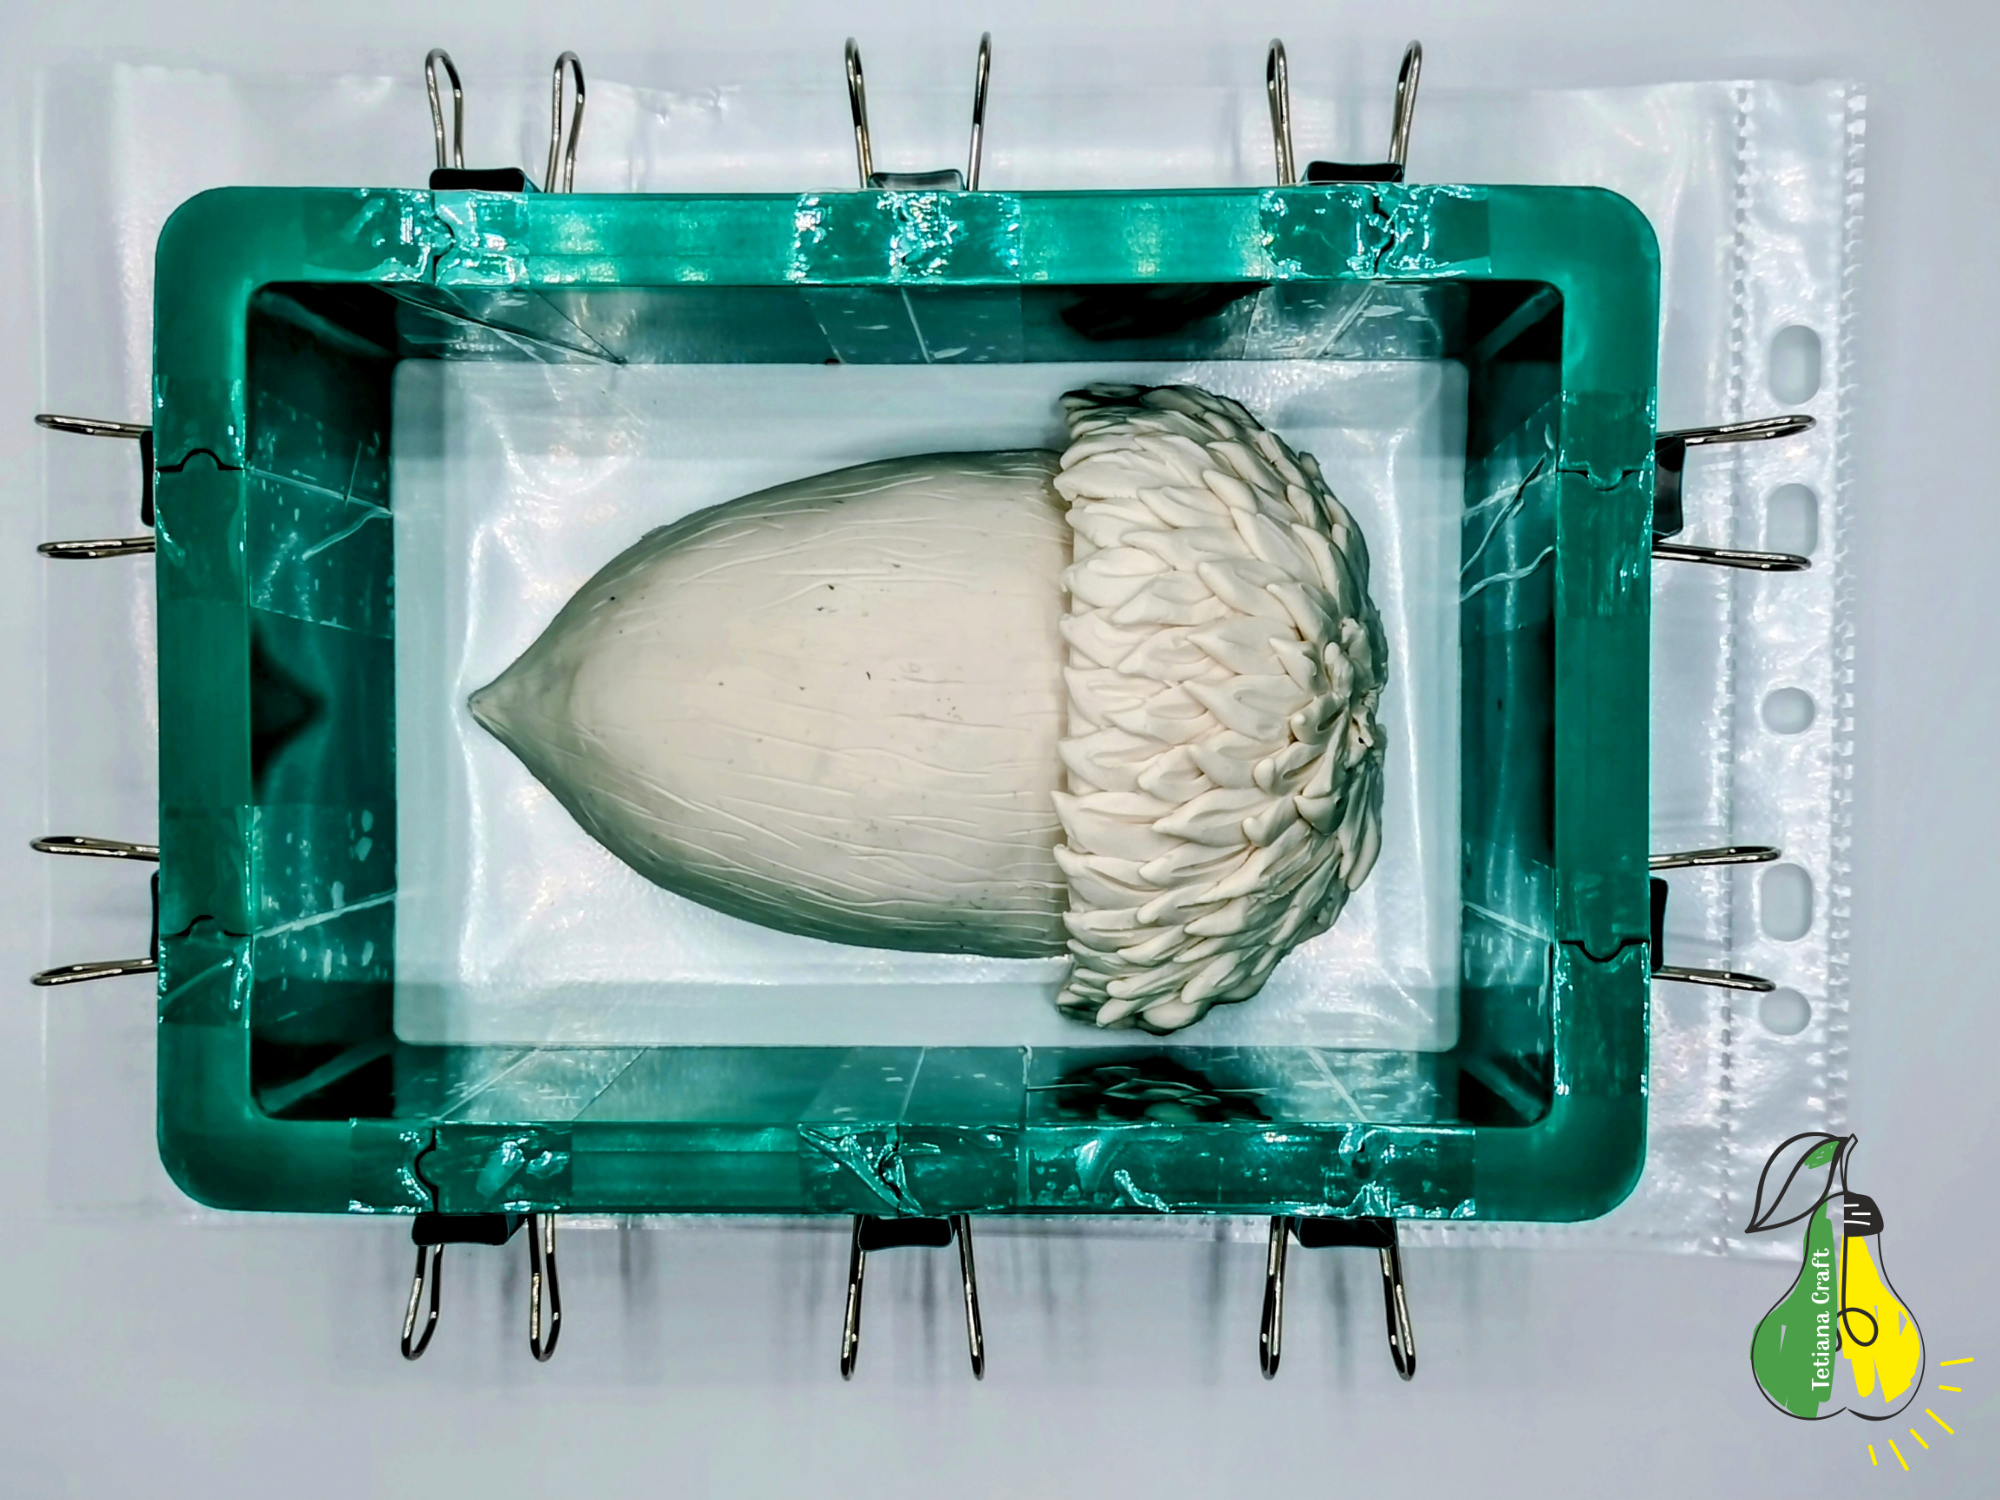
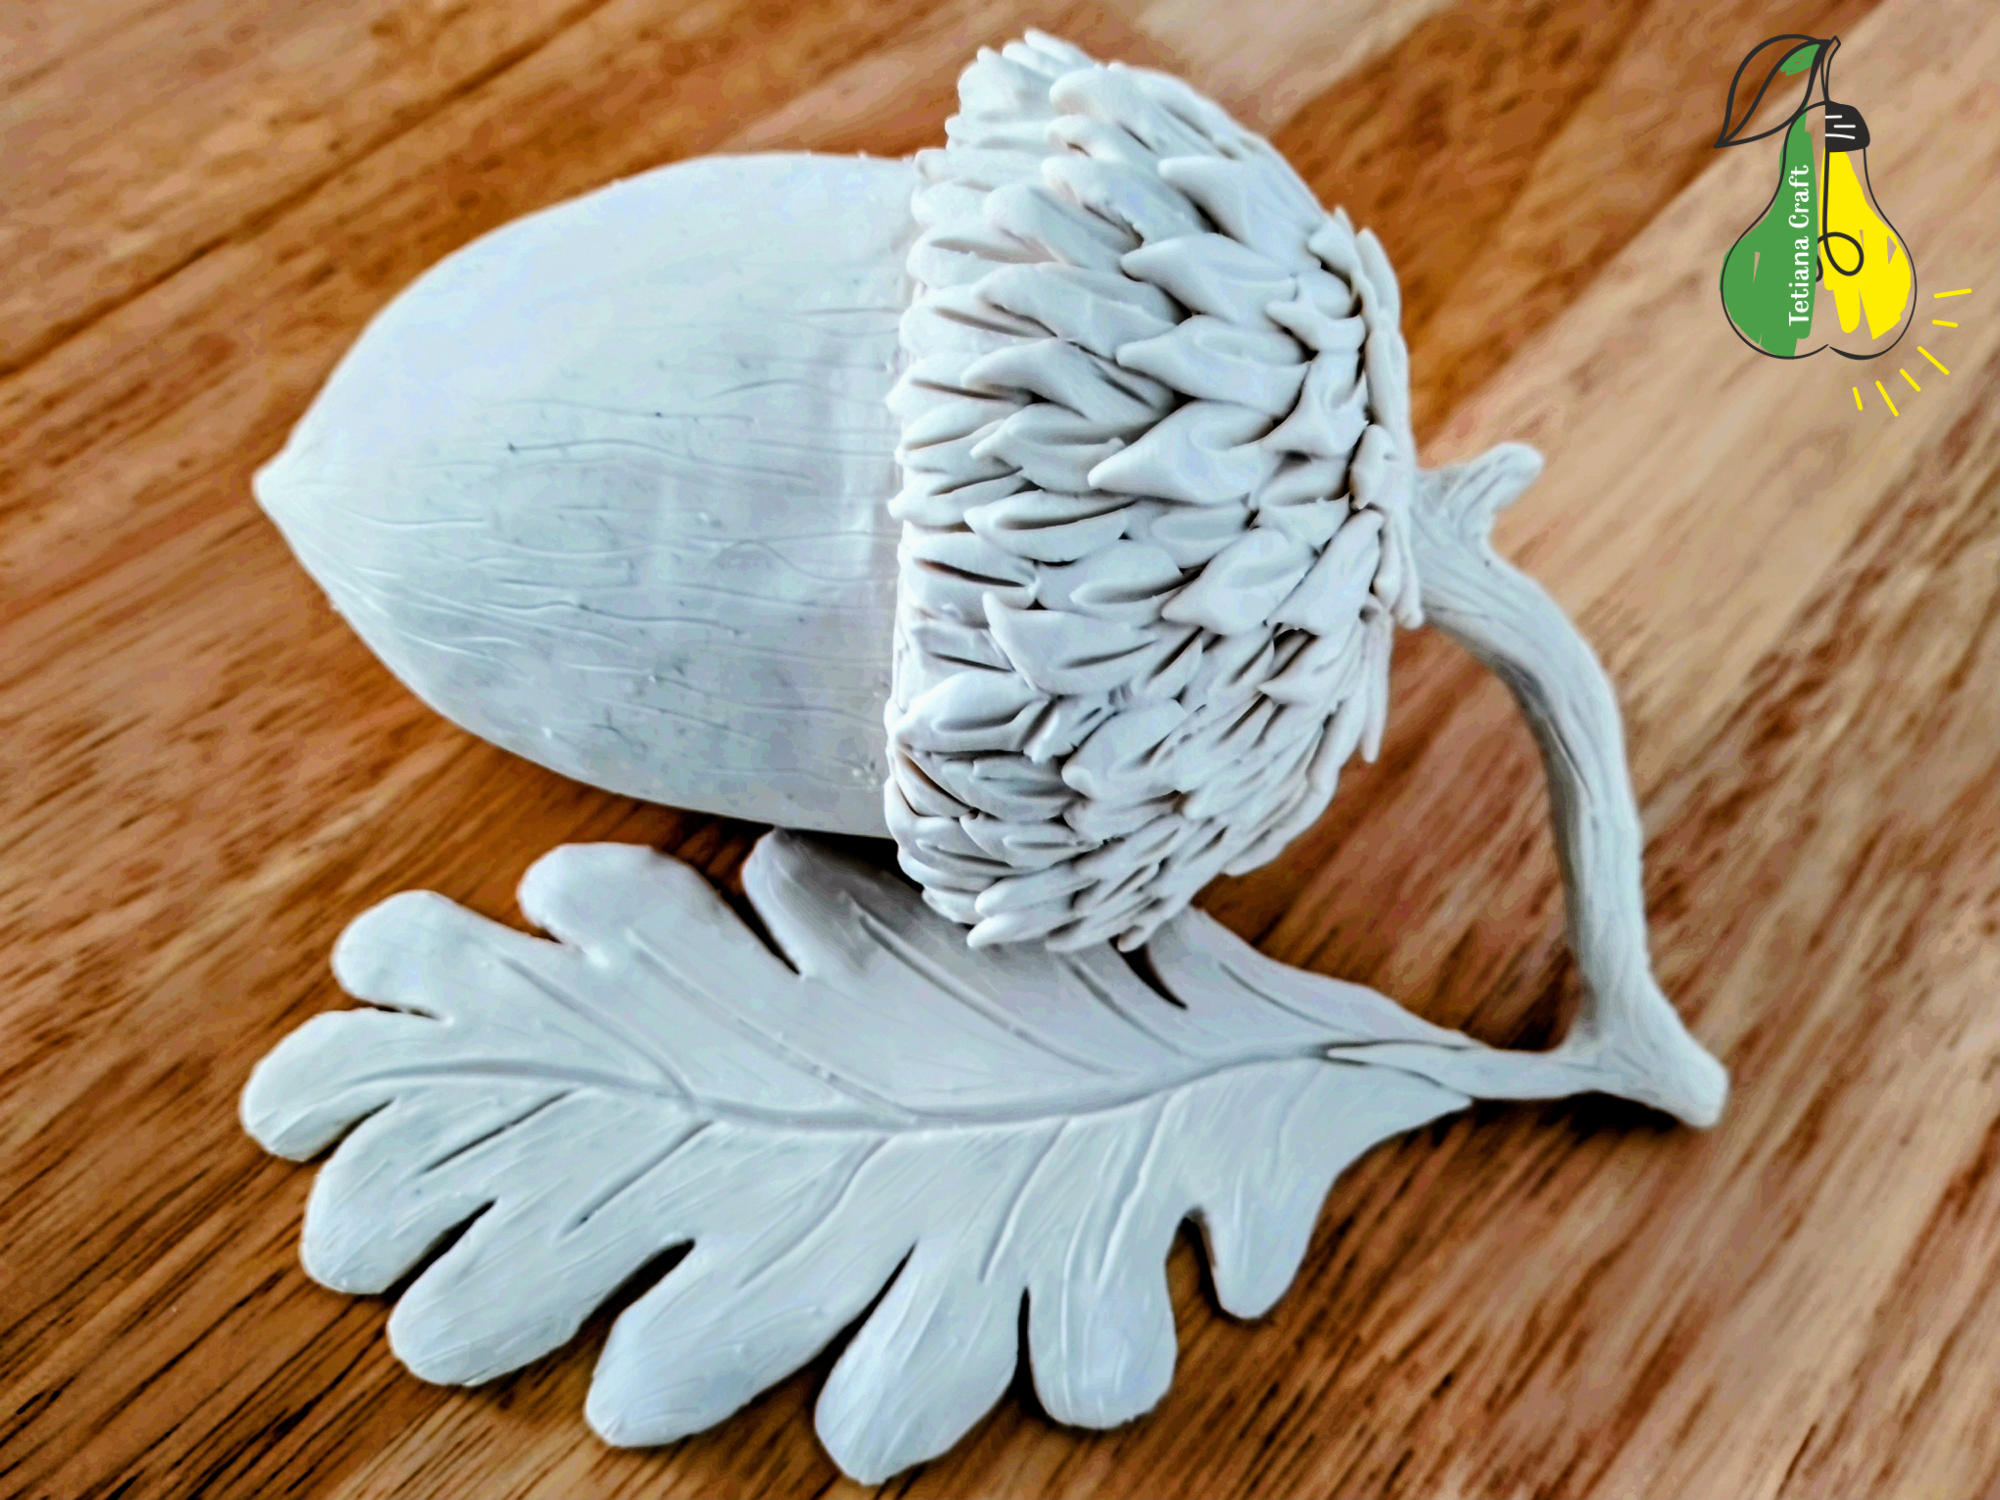
Tempering the Chocolate
Before applying the chocolate, it is crucial that it is properly tempered. I use the seeding method, which I detailed in my previous article about the Chocolate Acorn. Tempering ensures the chocolate sets with a beautiful shine, a crisp snap, and prevents blooming.
The Pouring Process
Ideally, the mold should be filled with chocolate in a single pour, but due to the small capacity of my chocolate melting machine, I had to repeat the process several times, which was less than ideal.
I poured the tempered chocolate into the assembled mold and tilted it in different directions to ensure the chocolate coated all the internal walls evenly. I took extra care to make sure the chocolate reached all the detailed, protruding areas, such as the ears, nose, and paws. My goal was to create a sturdy outer shell made entirely of chocolate, which would later be filled with a delicious, contrasting filling. This process resulted in a perfectly formed, hollow chocolate lion casing.
Filling the Chocolate Lion
What I love most about this cake-making method is the immense variety of fillings you can incorporate inside the chocolate shell. The only critical condition is that the fillings must not be hot, as this would instantly cause the tempered chocolate casing to melt.
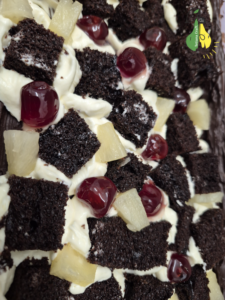
For the core of my lion cake, I separately baked a rich chocolate sponge cake (biscuit). I then cut this into small, manageable pieces. I dipped these sponge cake pieces into a smooth buttercream and then packed them tightly inside the hollow lion mold.
To enhance the flavor and texture, I also added sweet, glazed cherries and small pieces of preserved chocolate between the cake layers. This process of layering and tightly packing ensures that the final cake holds its shape perfectly and delivers a moist, multi-textured bite. (Detailed photos of this layering process are provided below.)
Sealing and Unmolding the Masterpiece
Once the mold was fully packed with the sponge cake and cream filling, I carefully leveled the top layer of cream and sealed the opening with a pre-prepared chocolate lid (a matching piece made earlier).
Using a small brush, I meticulously coated all the seams where the lid met the main body with additional melted chocolate. I waited patiently for this sealing layer to fully set and harden.
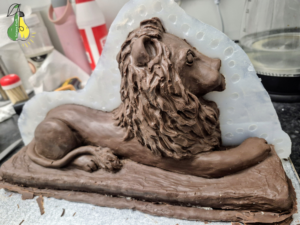
Now came the most critical and satisfying step: unmolding.
First, I flipped the mold over. I then gently removed the outer support jacket (the casing made with the 3D pen). After that, I carefully and slowly peeled away the silicone form—one half at a time.
Patience and care are crucial here to prevent any damage to the intricate chocolate details of the lion’s face. Rushing this step could ruin the final shape.
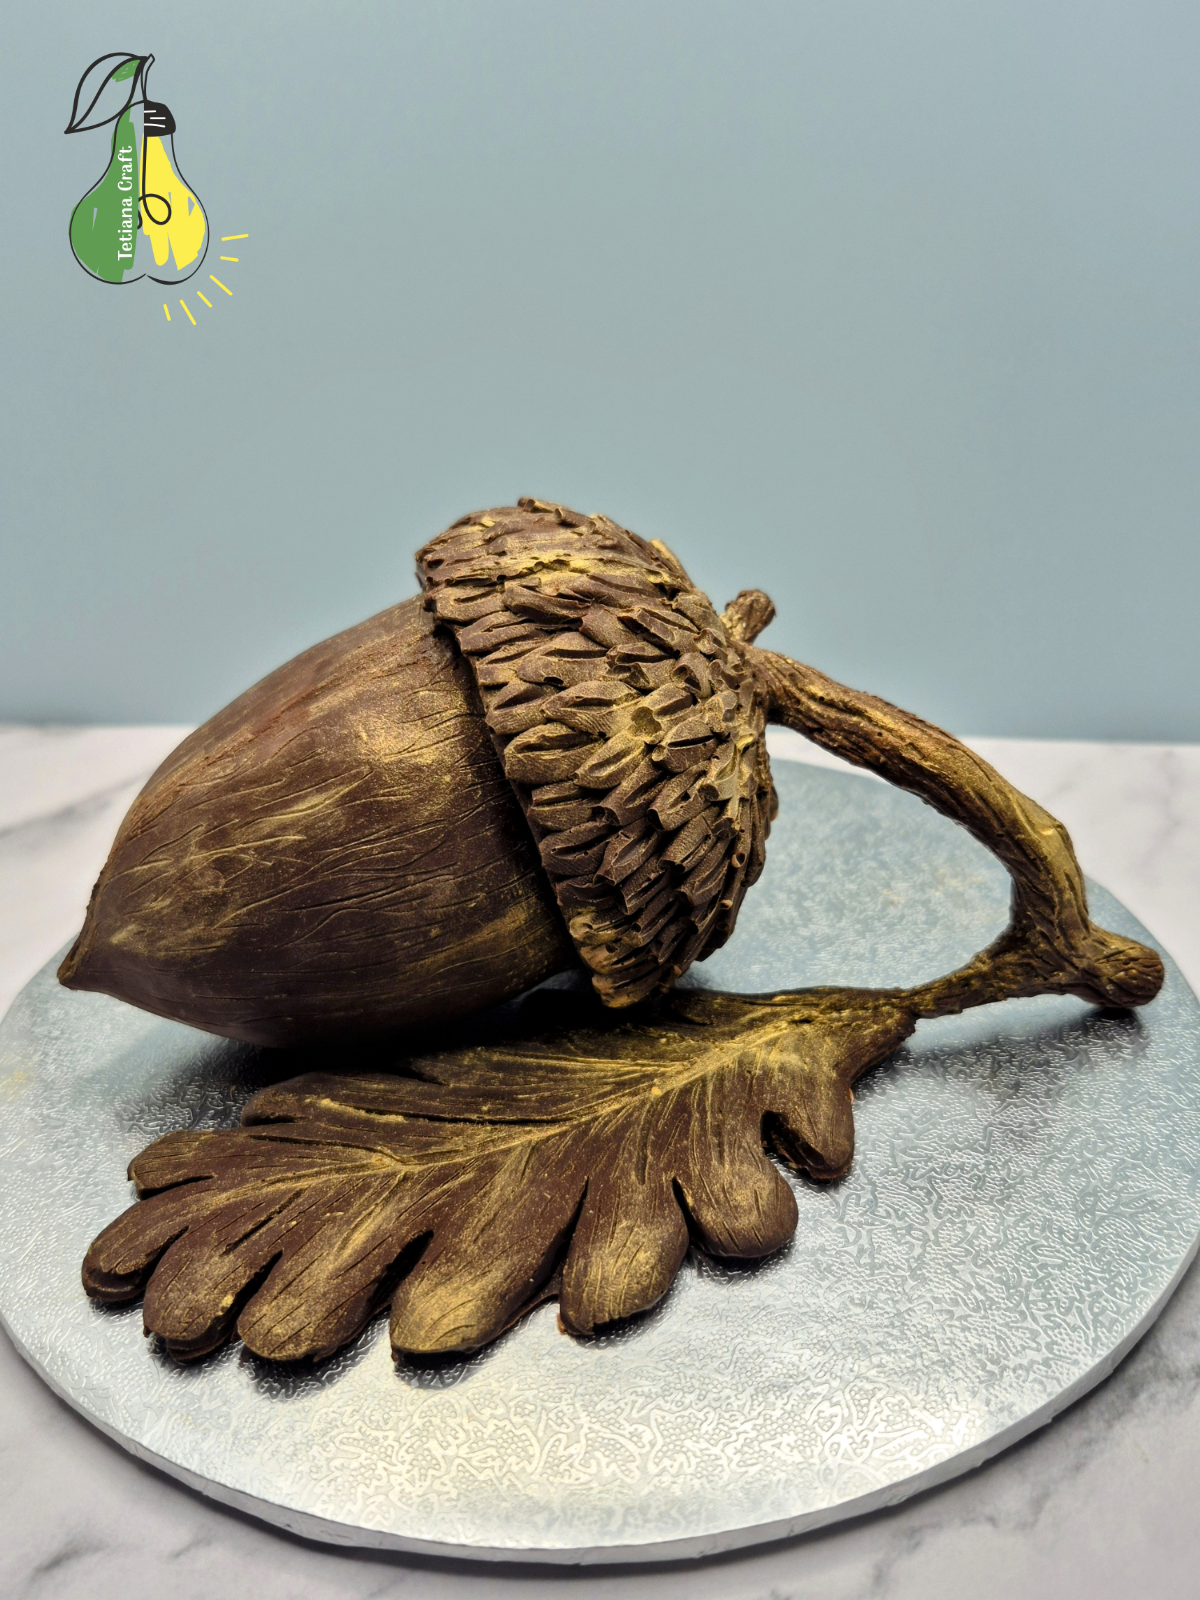
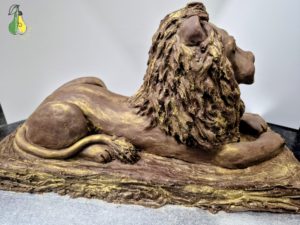
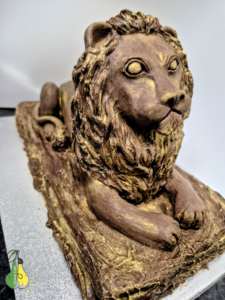
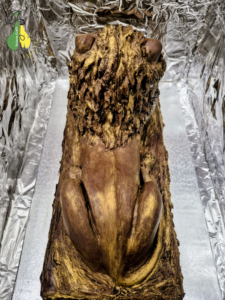
Finishing Touches and Golden Glamour
Once the cake was successfully released from the silicone mold, it was time to address any minor imperfections. This involved removing small seams from the mold lines and trimming away any solidified air bubbles. This is easily done using a small utility knife and a fine brush dipped in melted chocolate to smooth the surface.
A quick tip for chocolate work: I always use disposable cotton gloves. This prevents fingerprints and smudges from appearing on the highly polished chocolate surface during handling.
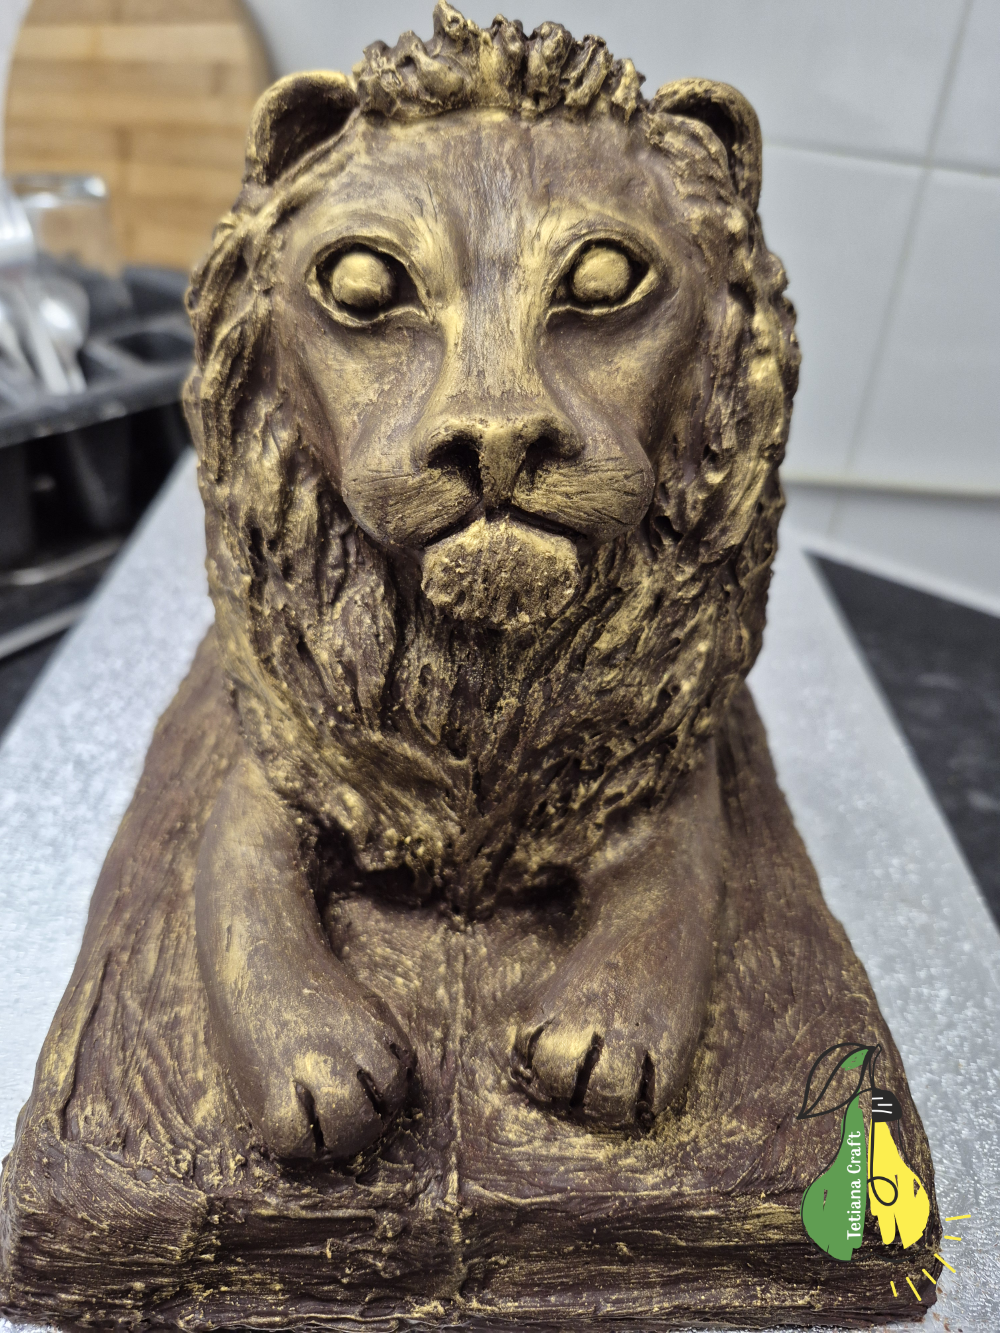
The Golden Highlight
After all minor defects were corrected, I used a clean, dry brush to apply Kandurin (edible luster dust) to the surface. I believe that this edible gold pairs perfectly with chocolate, giving the final piece an incredibly striking and sophisticated appearance.
Conclusion
That sums up the process! Below, you can see the final result of my efforts. The beauty of this project is that the silicone mold is durable and long-lasting, meaning I can create many more copies of this magnificent Chocolate Lion in the future.

This project perfectly demonstrates how custom tools can transform a simple dessert into an art piece. From the detailed custom mold to the careful layering of the filling, the Chocolate Lion is a labor of love—and definitely worth the effort!
Don’t be afraid to experiment with your own custom molds and filling combinations. The only limit is your imagination.
If you loved this process, share your thoughts in the comments below and tell me what shape you would tackle next!