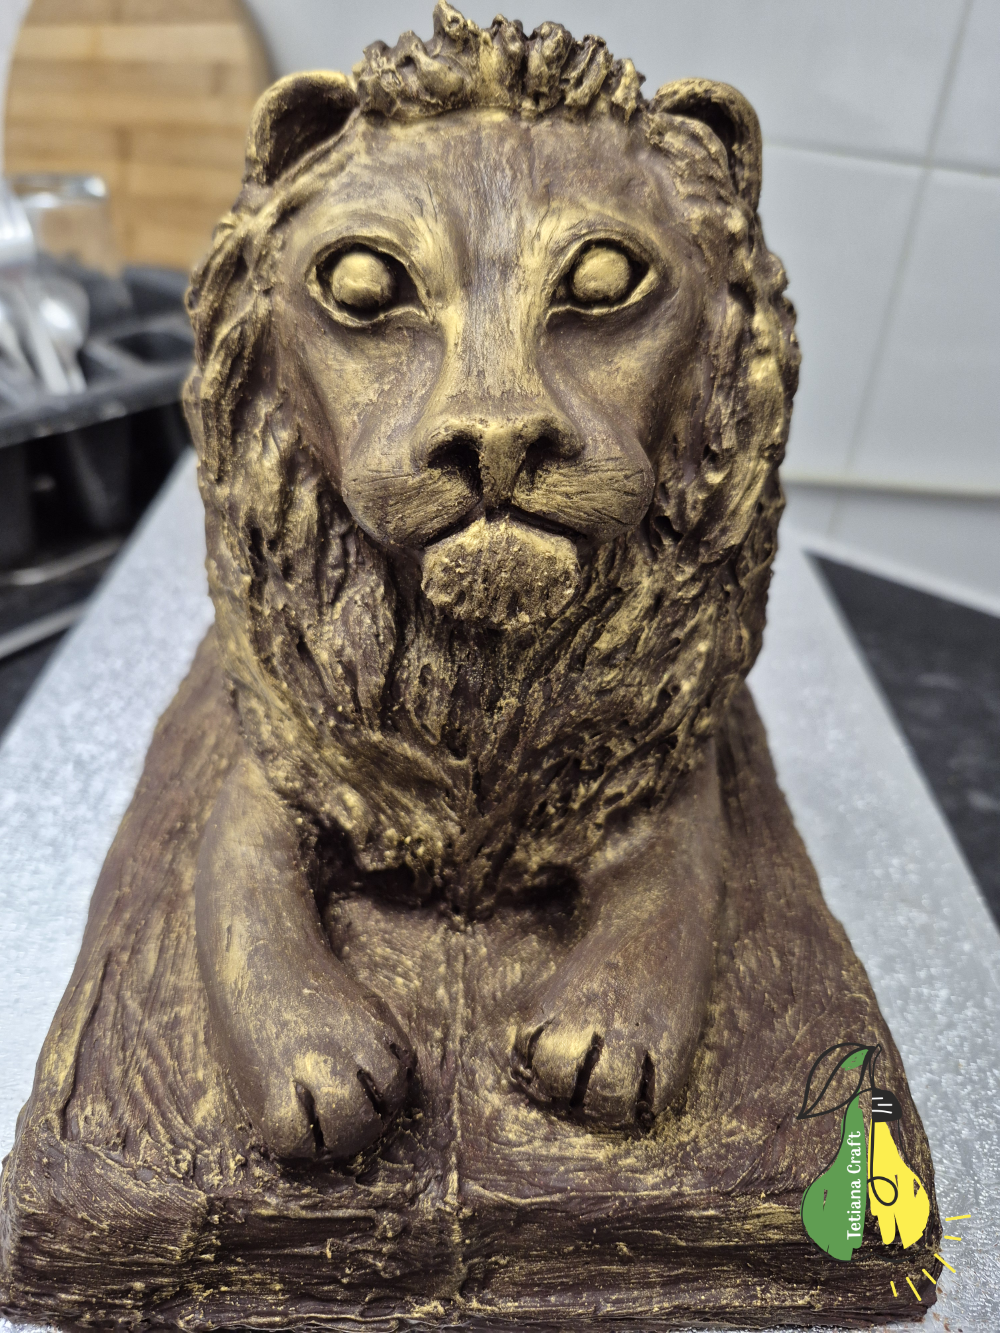
In my previous article, I described in detail how I created a lion sculpture using modeling clay. You can read about it by following this link. That was the first and a very crucial stage. Now, I want to detail the second stage: creating the silicone mold. This stage is quite time-consuming and requires precision, as the accuracy of your final chocolate products will depend entirely on it.
Finding the Right Tool
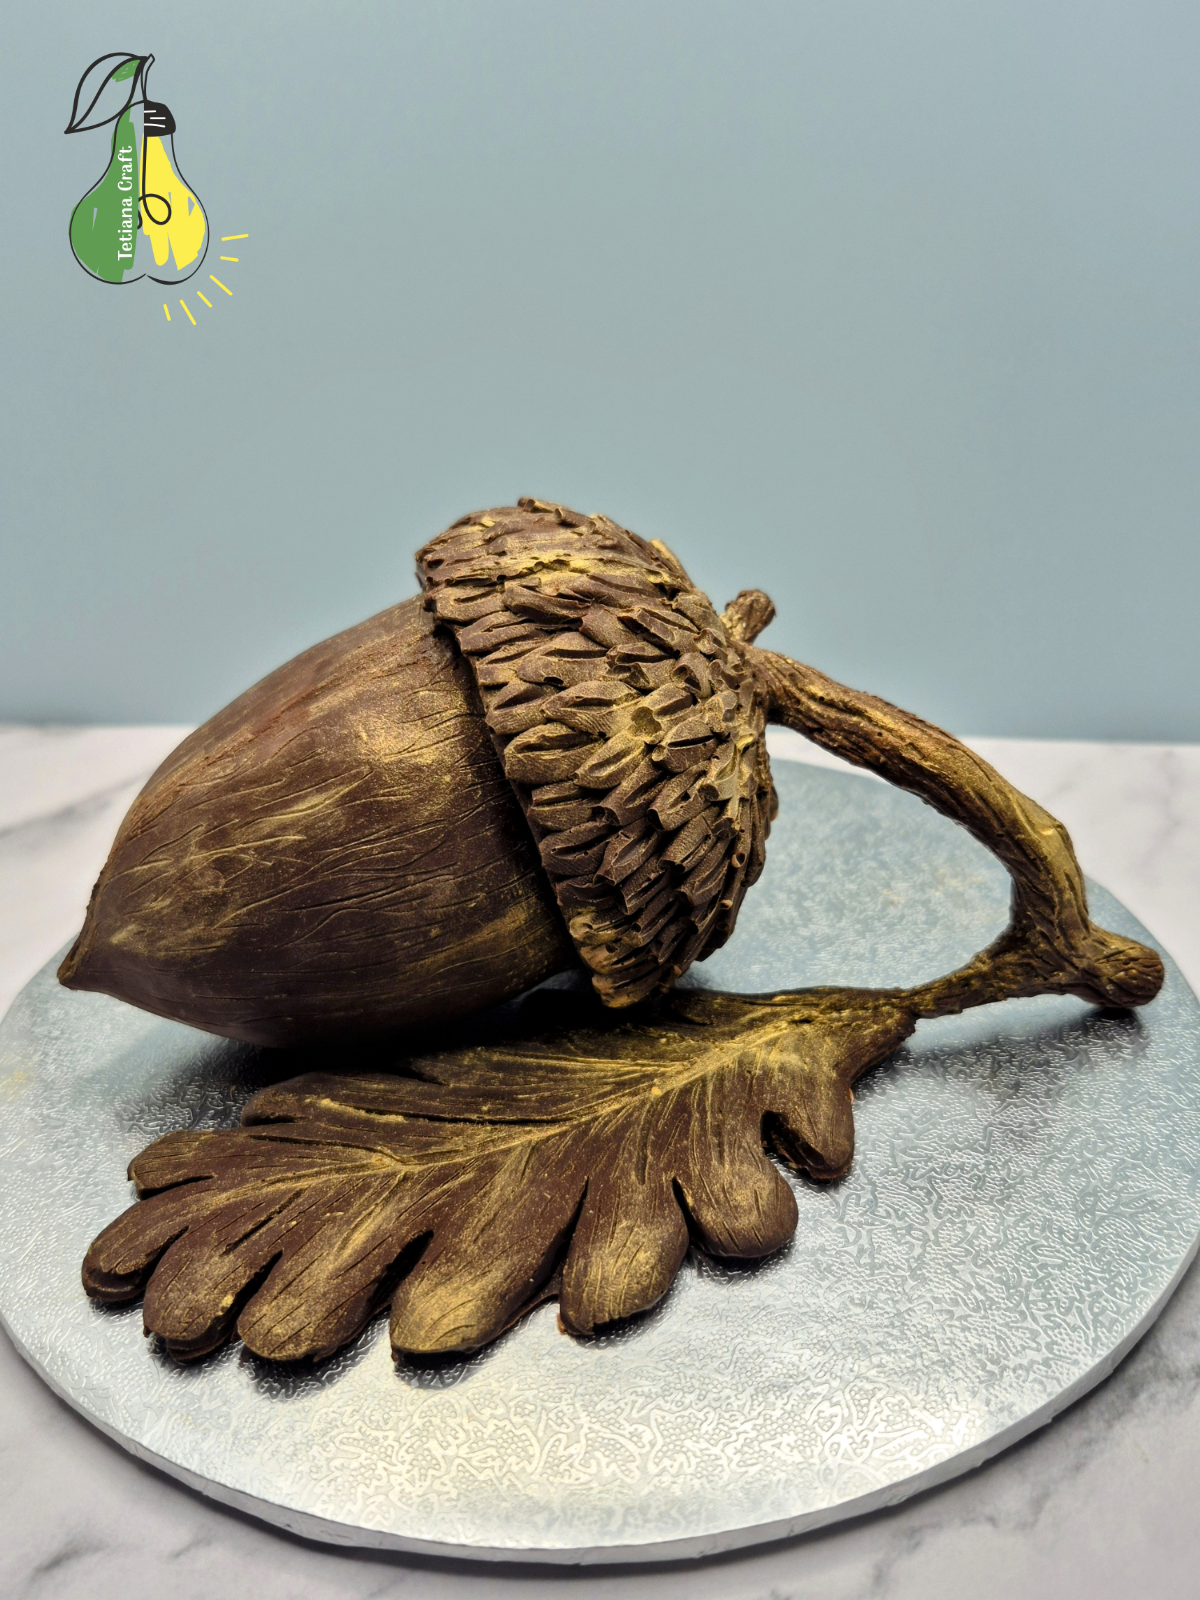
Creating the silicone mold for the acorn was significantly easier. The item itself was much smaller and had fewer fine details. Last time, I simply divided the acorn into two halves with a knife before pouring the silicone. This method would be inefficient this time. Theoretically, I also needed to divide the lion into halves, but only temporarily. It was crucial to do this while ensuring minimal surface damage. I started searching for different solutions and finally found the perfect one. On Amazon, I found thin metal cards used for engraving. They turned out to be ideal for my purpose. These thin, durable plates easily insert into and are removed from the plasticine without causing deformation. You can see a more detailed image of the cards below.
![]()
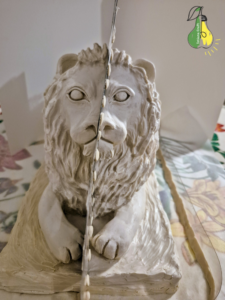
Setting the Split Line and Registration Keys
I took the metal plates and carefully inserted them precisely down the middle along the entire length of the sculpture. In some areas, I had to embed them quite deeply. I sealed the joints (or seams) of the plates with tape. I miscalculated the number of metal cards, so I had to fill a small gap using a piece of thick acetate film. On top of the plates, I attached small plasticine balls spaced slightly apart. This simple technique helps create a higher-quality silicone mold, as the halves will lock together better—these serve as a type of registration key. Where the plasticine balls protrude, the future silicone mold will have indentations (sockets). Conversely, the other mold half will have small protruding bumps (keys) that will fit directly into the indentations, helping the silicone mold maintain a stable shape.
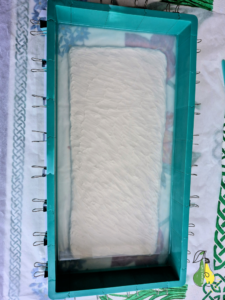
Finally, to prevent the uncured silicone from spreading and to form clear mold boundaries, I taped an acetate film wall (or barrier) around the base. For extra reliability, I sealed the seams of this wall with plasticine.
Food-Grade Silicone and the Viscosity Challenge
I encountered a major difficulty: because the silicone mold is being created for chocolate, I could only use platinum-cure silicones (food-grade). As I did with the acorn, I used the Startso World brand. This silicone has a low viscosity, high tear strength, and excellent fidelity for capturing fine details.
While a colored silicone option is available, I find it much more convenient to use clear silicone. This transparency helps me identify areas where the silicone layer might be too thin.

The main issue arose because I could not find a suitable thixotropic agent—an additive that thickens the silicone—that is also safe for use with food products. This worked perfectly with tin-cure silicones (which are not food-safe). However, if I were to brush the lion with highly liquid platinum-cure silicone, it would simply run off and cover the form unevenly.
Therefore, only one solution remained: I had to wait for the silicone to begin curing slightly before applying it to the sculpture. This is a very tedious process, and I had to set a timer. Given the current temperature and humidity, this “waiting” period took about two hours per batch. To speed up the overall mold creation process, I mixed several batches of silicone at one-hour intervals. While a good thixotropic agent would eliminate this laborious stage of work, unfortunately, to this day, I have not found a safe additive that allows me to alter the viscosity of food-grade silicone.
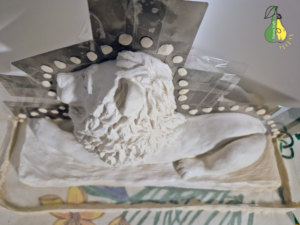
Removing the Split Line and Smoothing the Surface
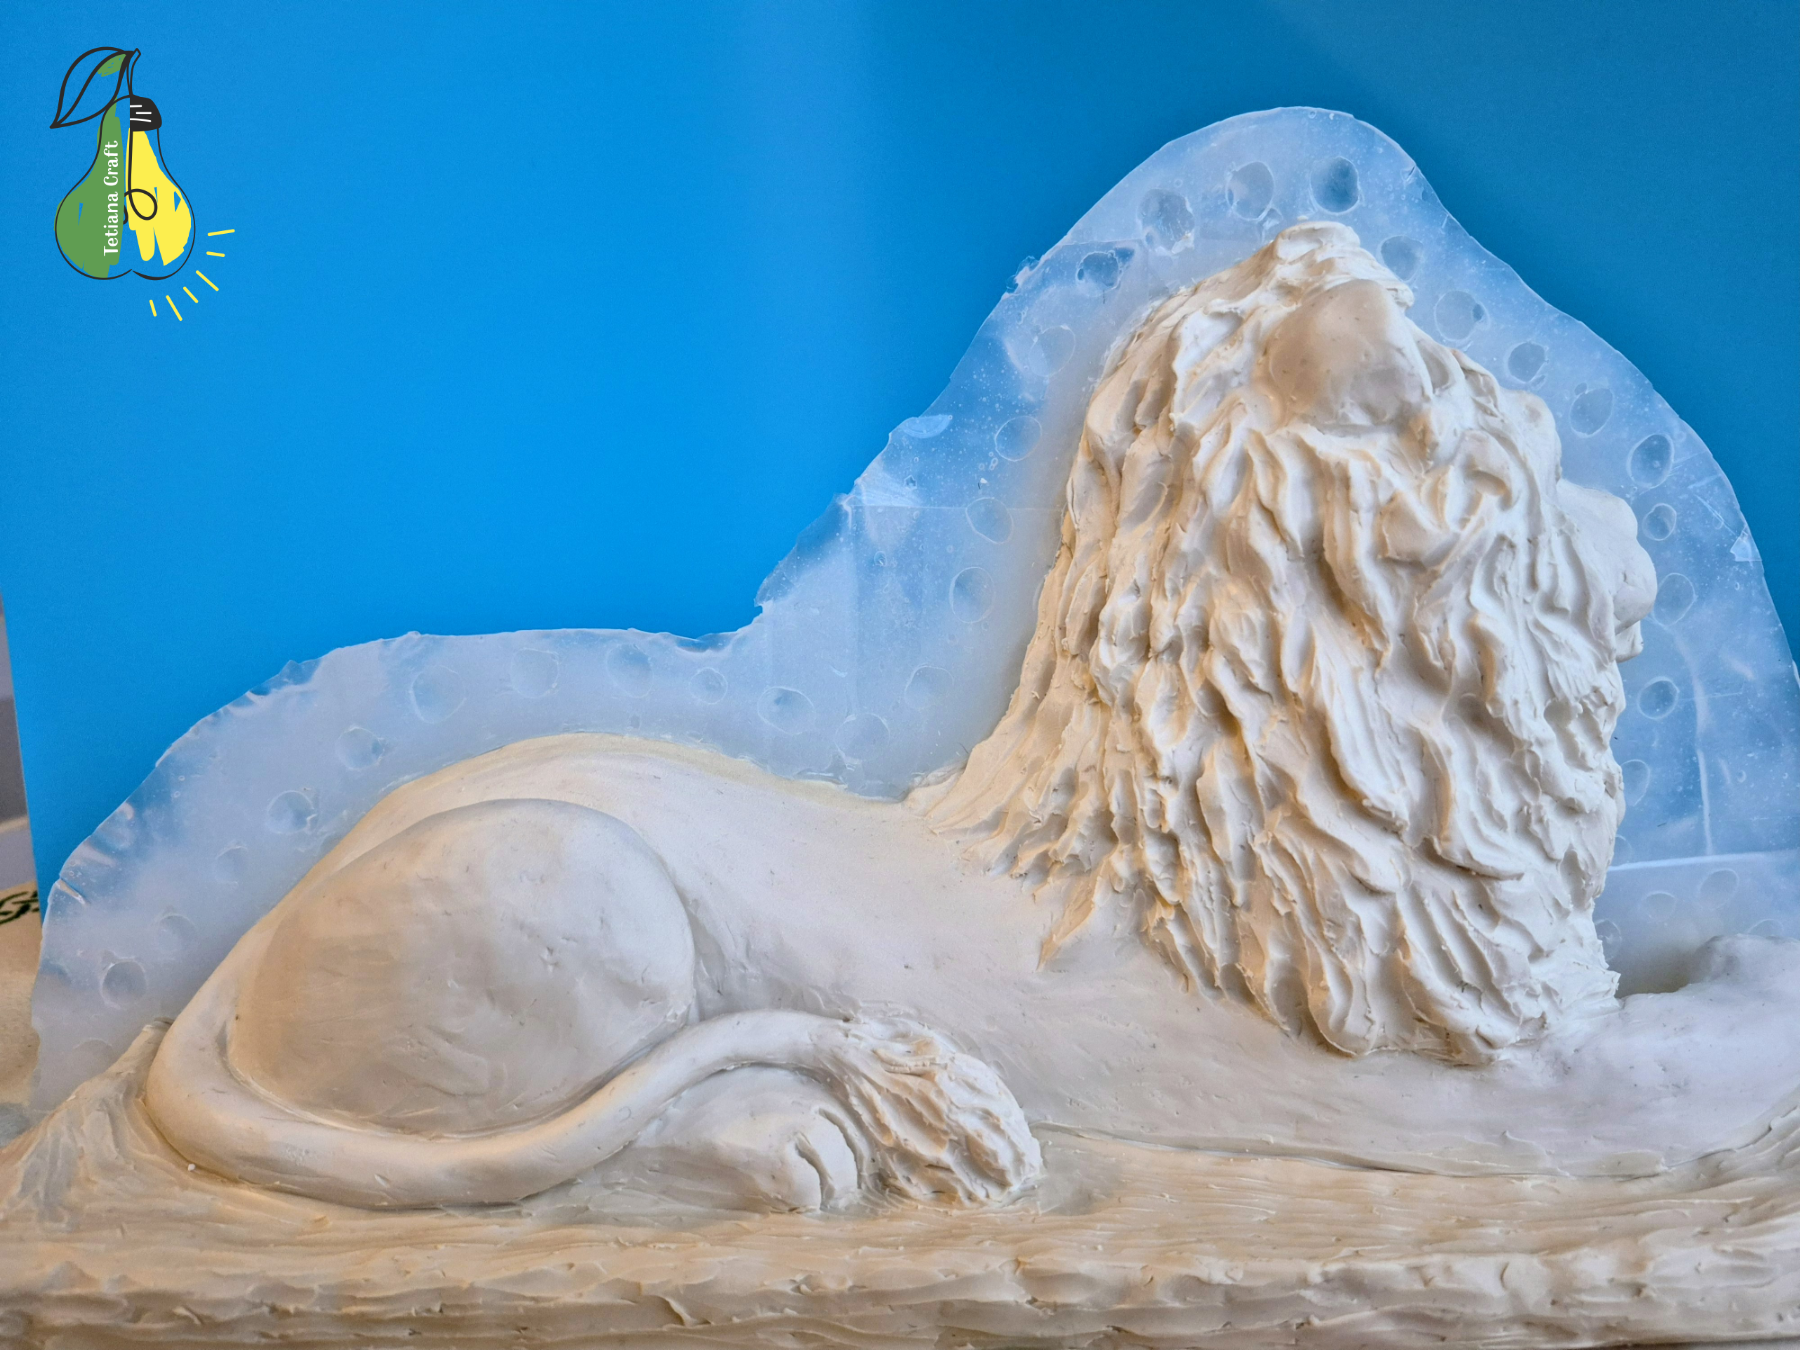
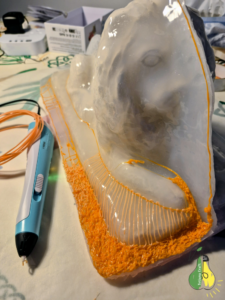
Once one side was covered with a sufficient layer of silicone, I carefully removed the metal plates. I smoothed out all the resulting irregularities. Modeling clay is a very pliable material, which made this task easy. You can see the final result in the photo below.

The Critical Stage: Applying the Release Agent
Now, pay attention to a very critical stage. One half of the silicone mold is complete, and I needed to create the second half. Where the uncured silicone will touch the plasticine, it will separate perfectly when you demold the object. However, if you pour liquid silicone directly onto the cured silicone, they will bond permanently!
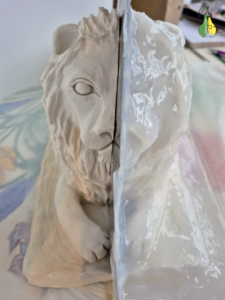
As you saw in the photo above, the first part of the “registration key” (lock) is already formed. This surface must be thoroughly treated with a release agent to create a thin film between the two mold parts. I previously conducted a small experiment with various release agents readily available at home. If you missed that article, you can read about it here. In short, petroleum jelly proved to be the best option.
Therefore, it is crucial to thoroughly apply petroleum jelly to the silicone surface where the two halves will meet. Below, you can see the finished silicone mold, consisting of two parts.

Creating the Base and Final Structure
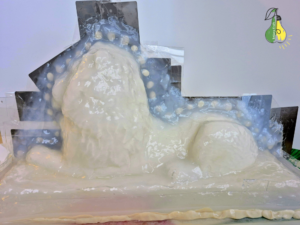
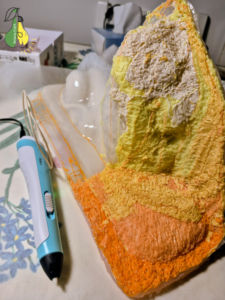
I designed the silicone mold so that the base would also be covered in chocolate. Therefore, I sculpted a thin layer of modeling clay that perfectly matches the lower contours of the sculpture. Next, I placed the assembled mold halves into a reusable mold box and poured in the liquid silicone. This was the easiest step of the entire process. Ultimately, the lion silicone mold consists of three parts: the two upper halves and one bottom base piece.
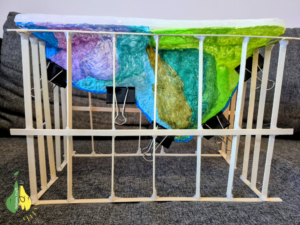
The Support Shell: An Innovative Solution
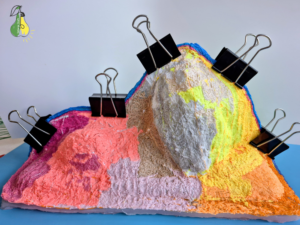
The silicone mold is created, but this is not the end. The mold turned out to be quite thin, and it could lose its shape under the weight of the chocolate. An individual support shell (or ‘mother mold’) is required—one that is sturdy and precisely follows the contours of the silicone. This must be done before removing the silicone mold from the prototype. This rule applies to all molds where the silicone layer is thin and requires external support.
Previously, for a garden sculpture, I used fiberglass and industrial epoxy resin, but this is absolutely unsuitable for making food-grade molds. I had to look for alternatives. A plaster shell seemed too heavy and bulky. Furthermore, if chocolate were to spill onto it during the process, how would I clean it? A papier-mâché shell is prone to absorbing moisture, especially if I place the mold in the refrigerator overnight.
Reviewing various options, I found an unexpected solution: trying a 3D pen. The plastic I used was PLA.
PLA Plastic Advantages:
-
Biodegradable and Food-Safe (usually): PLA is derived from renewable resources (like corn starch) and is generally considered food-safe, provided it’s virgin plastic and the 3D pen tip is clean.
-
Ease of Use: It has a low melting temperature and is easy to work with.
-
Durability and Lightweight: The resulting shell is light yet strong.
This support shell successfully follows the silicone mold’s contours, is very light and durable, is not sensitive to moisture, is easily washable if necessary, and does not react with food products (as it is external). The only drawback is that creating this shell is time-consuming. I spent one evening creating just one half. You can see the result below.
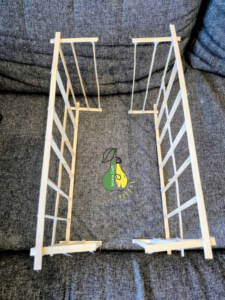
Final Step: Building the Support Frame
It is time to describe the final stage: creating the external support frame. I decided not to overcomplicate the support shell (mother mold) and created the support frame separately. I took bamboo sticks and fastened them together using a hot glue gun. The result was a sufficiently sturdy frame that perfectly fulfilled its function.
Conclusion
Well, that’s all! This article turned out to be quite lengthy, but that was necessary to describe all the nuances involved in creating the silicone lion mold. In the next article, I will tell you and show you what the resulting chocolate lion looks like from this mold. See you then!