A New Material, The Same Mold
I love experimenting with different materials, so I decided to check: Why not use caramel and see what results I get?
This experiment is possible thanks to the properties of my mold. The working temperature of caramel when pouring into molds is approximately 145 °C – 155 °C (293°F-311°F).
The maximum working temperature for food-grade silicone with a platinum curing agent (such as the Startso World type I used) is up to 250 °C (482°F).
Because of this high heat resistance, I can conclude that my silicone molds are suitable for use not only with chocolate but also with hot caramel, opening up vast possibilities for confectionery creativity!
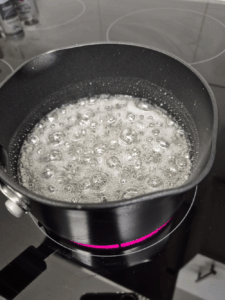
Caramel Preparation: The Hard Candy Method
I used a small saucepan with a thick, non-stick bottom. This is crucial for even heat distribution and preventing the sugar from burning. For this experiment, I utilized a simple recipe commonly used for hard candy or lollipops.
Ingredients:
- Granulated Sugar: 200g (7 oz)
- Water: 70-80ml (approx. 1/3 cup)
- Citric Acid: A small pinch (or a few drops of lemon juice)
Step-by-Step Process
- Combine Ingredients: Place the sugar, water, and citric acid into the saucepan.
- Initial Melting: Heat the mixture over medium-low heat. Stir gently only until the sugar is completely dissolved. Important: Stop stirring once the mixture begins to boil to prevent crystallization.
- Boiling: Increase the heat to medium. Allow the syrup to boil undisturbed. The goal is to evaporate the water and concentrate the sugar solution.
- Temperature Check: Use a candy thermometer (or a reliable digital thermometer) to monitor the temperature. Continue boiling until the syrup reaches the hard crack stage (approximately 145°C to 155°C or 293°F to 311°F.
- Cooling and Flavoring: Immediately remove the saucepan from the heat. To stop the cooking process, briefly place the bottom of the pan into a cold water bath. Once bubbling subsides, you can carefully stir in any flavorings or colorings (optional).
⚠️ Safety Warning:
CAUTION! Working with molten sugar and caramel is highly dangerous. Caramel reaches temperatures that can cause severe, painful burns. Always wear heat-resistant gloves and exercise extreme care when pouring and handling the hot pan.

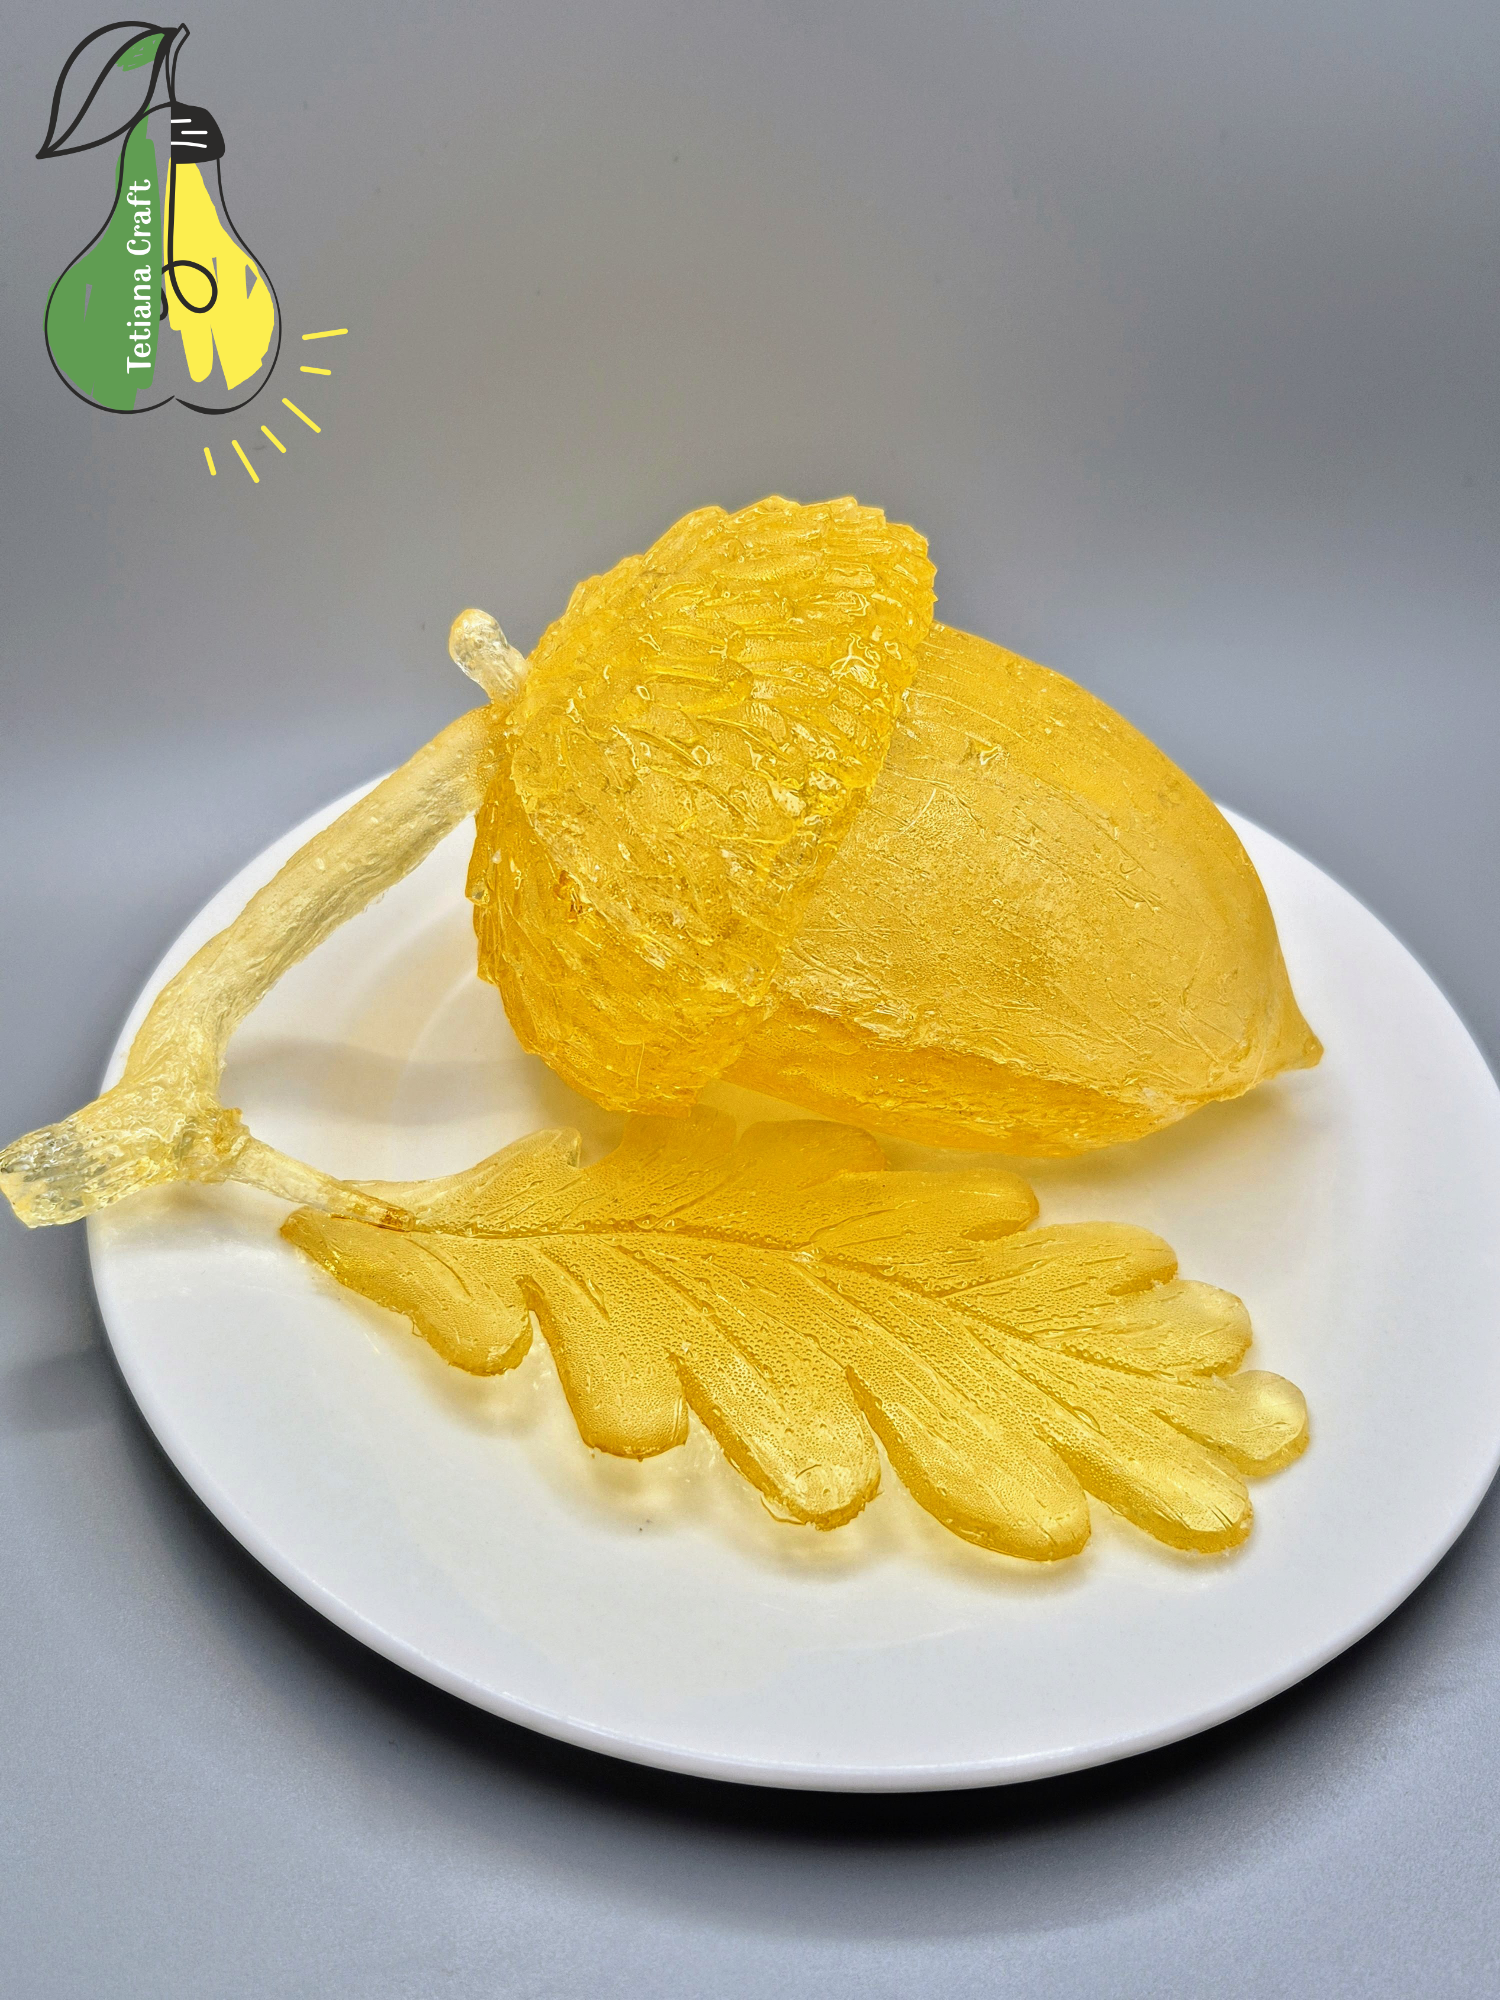
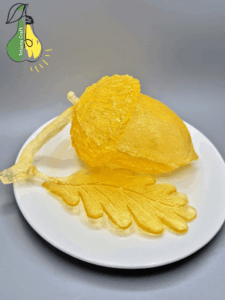
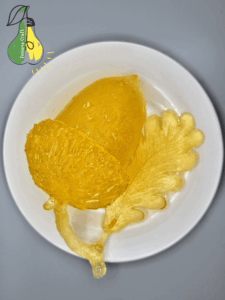
Molding and Assembly
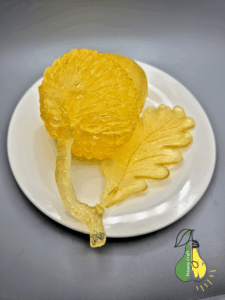
I poured the hot caramel into the molds.
After the caramel cooled and hardened, I joined the halves together using the exact same method as I did with the chocolate. I pressed the halves onto a hot pan for a few seconds, and then quickly adhered them together. I attached the leaf and the twig to the acorn using a small amount of freshly melted, hot caramel.
Final Results and Next Steps
You can see the exciting results of my experiment in the photos below!
If you haven’t read my previous article on the Chocolate Acorn yet, click here.
This experiment was a success, and in the next series of articles, I will detail how I created a Chocolate Lion!