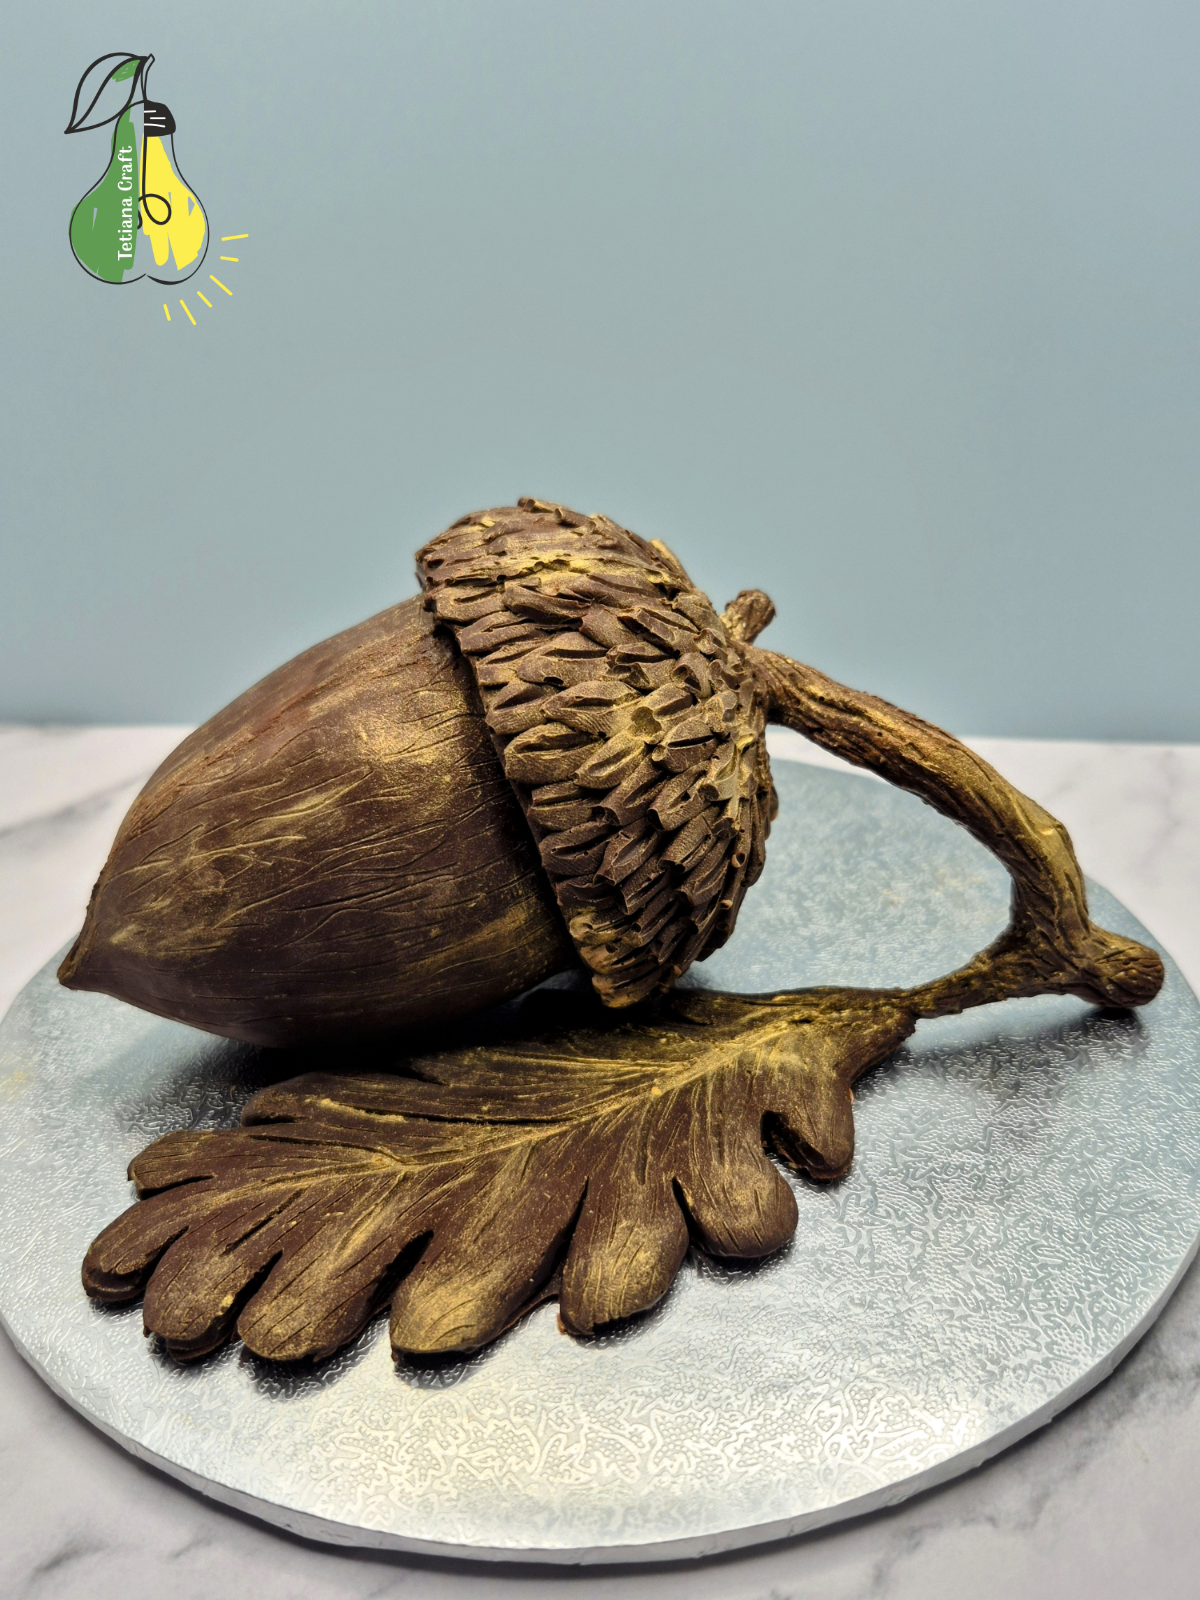
So, the model of the plasticine acorn has been made. If you haven’t read my previous article about it, you can click here. For anyone interested in casting it, a silicone acorn mold will be helpful.
I divided the acorn into three parts: the acorn itself, a twig, and a leaf. Consequently, I needed several silicone molds. A specific silicone acorn mold was crucial for the acorn itself. As it turned out, I encountered more difficulties during the process than I expected. Below, I’ll try to describe each step in more detail.
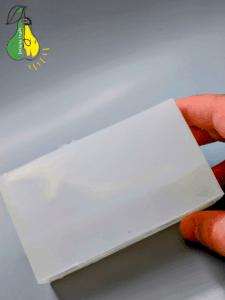
Food Safe Silicone
Two-component silicones used for mold making are generally divided into two main groups: platinum-cure and tin-cure silicones. Only platinum-cure silicones are safe for food-grade applications (or food contact). In fact, there are significant limitations when selecting materials for food products. Unfortunately, I had to discard many potential options. As I’m unfamiliar with the UK market, I ultimately chose this silicone, pictured below, for casting my acorn.

This new material presents several distinct advantages. These include the straightforward 1:1 mixing ratio of components A and B. Its designation as food-grade and its odorless composition; and its self-degassing capability, which allows air bubbles to escape during the curing process, negating the need for vacuum equipment. I am highly satisfied with the performance of this brand. My previous experience was limited to tin-cure silicones, which, while convenient, are unsuitable for food contact applications. This required an adjustment to my working procedures.
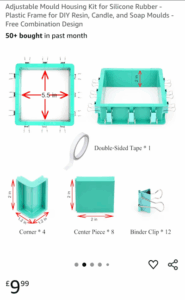
Plastic Frame for Homemade Molds
I am extremely pleased with this purchase, which I discovered by chance on Amazon. This system is perfect for creating small custom molds. Since it allows for precise control over the length, width, and height, I have bought several sets to expand my capabilities.
Initially, I secured the vertical seams with duct tape, but I soon realized this was unnecessary. I now only need to secure the base using double-sided tape.
All available dimensions are referenced in the accompanying photo. A simple Google search will reveal multiple purchasing options for this versatile product.
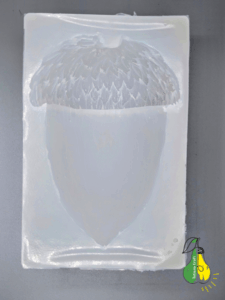
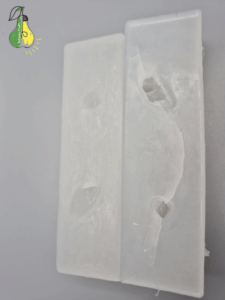
A Silicone Mold for the Acorn Itself
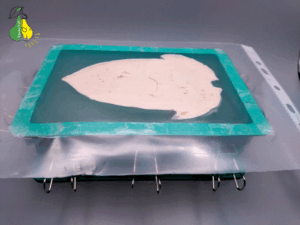
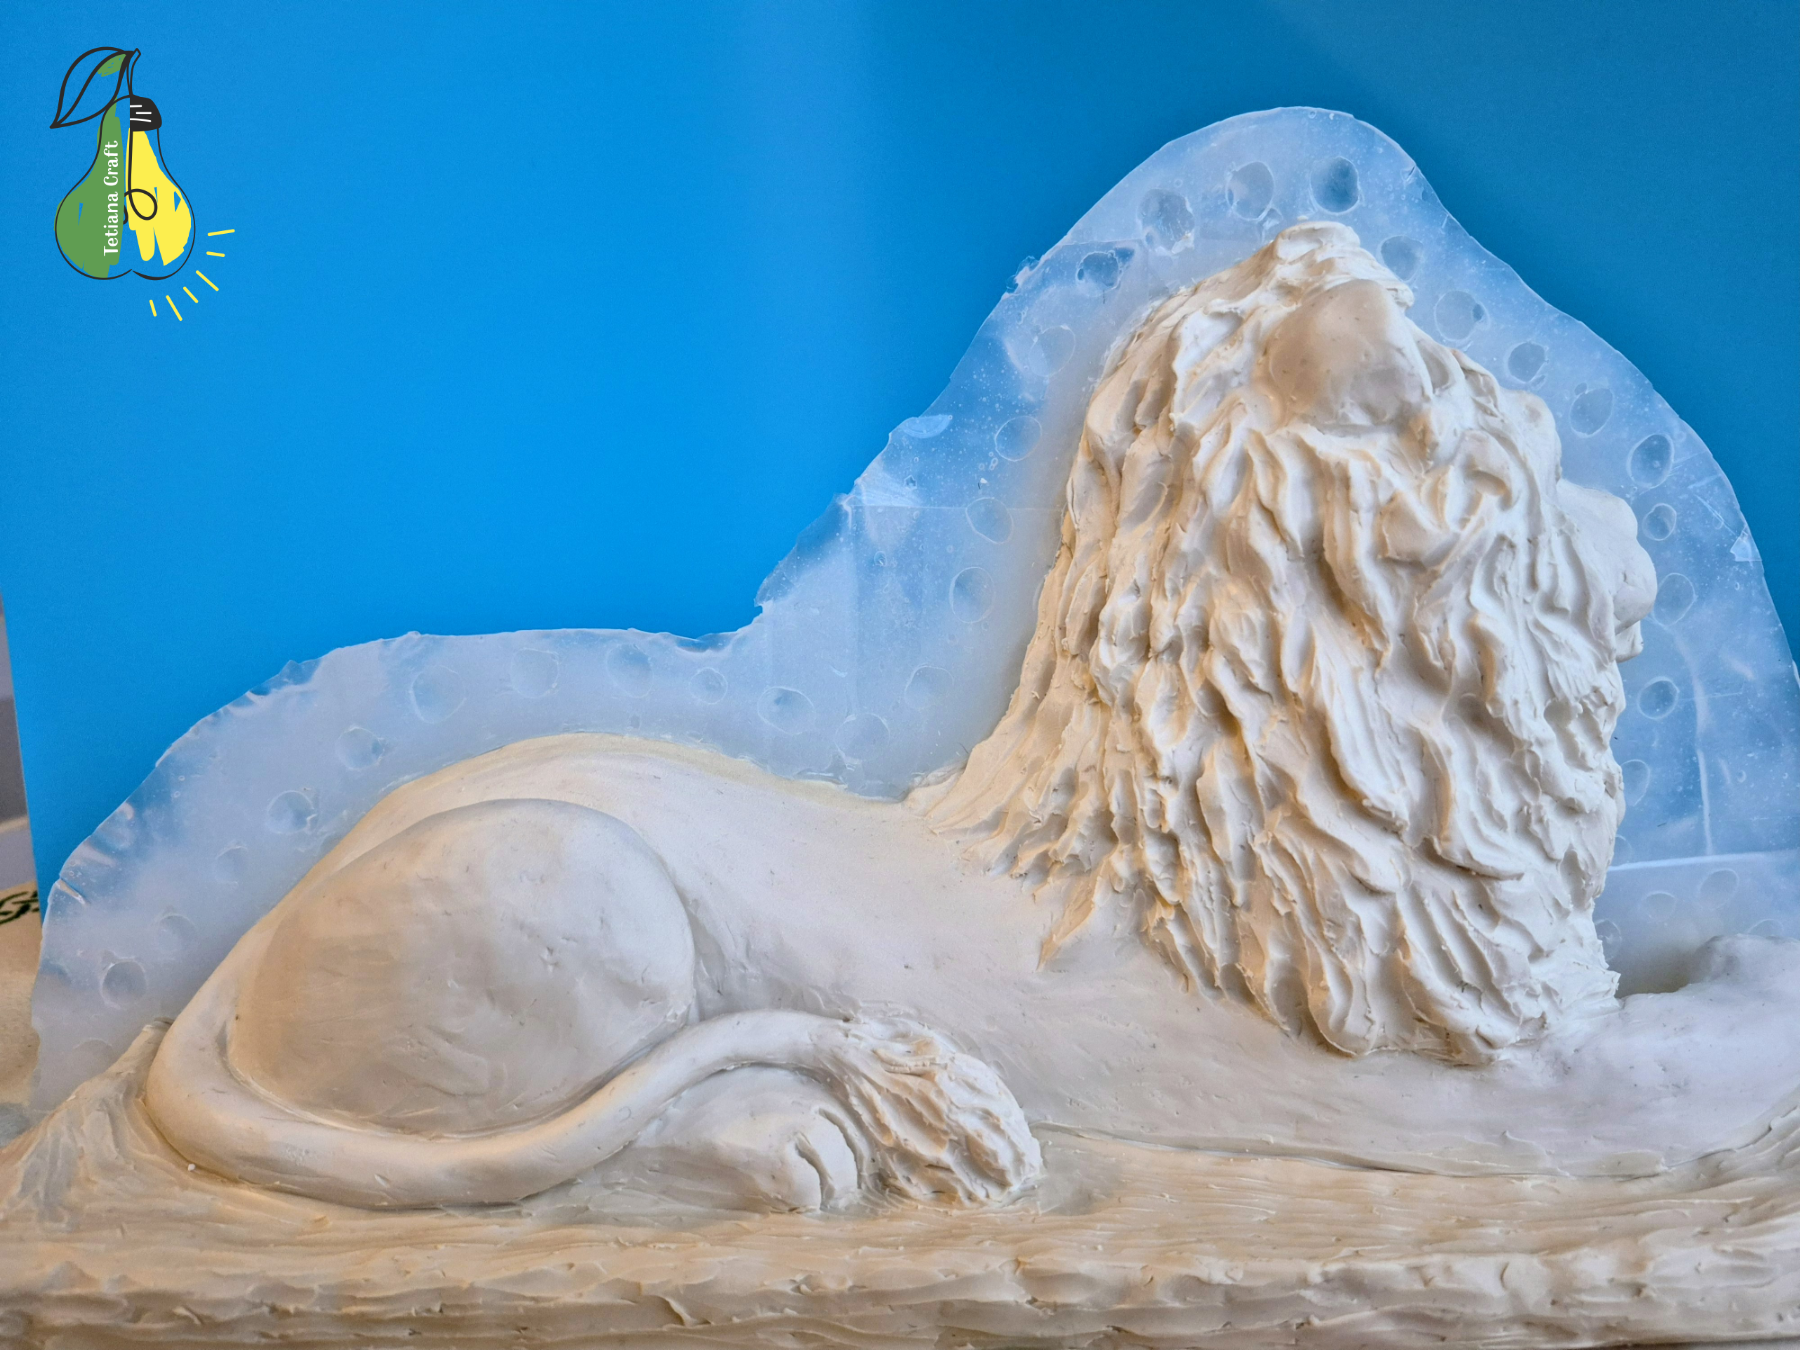
I decided that cutting a plasticine acorn in half would be the best approach. However, the acorn began to deform the moment I tried to cut it with a knife. My husband, who is a chef, wasn’t thrilled when I attempted to use his high-quality professional knives for the task, and ultimately, it didn’t work out. Then, I remembered my Chinese hatchet—what a marvelous tool. Since it’s made entirely of metal, I simply heated it in hot water and sliced the acorn cleanly in a single, smooth motion. It truly is a versatile tool!
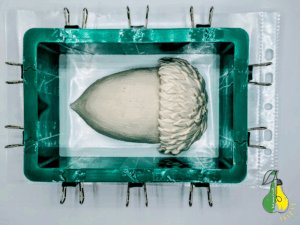
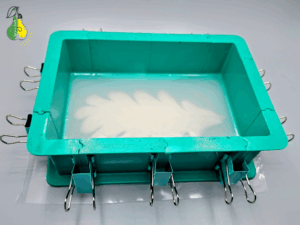
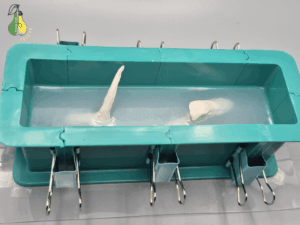
I first assembled the plastic frame to the desired dimensions and secured the bottom by taping a standard file (sheet protector) with double-sided tape. As a note for future work, an acetate film would result in a perfectly flat mold base. Since this was an experiment, however, I opted to use as many accessible materials as possible. The photo below demonstrates this setup.
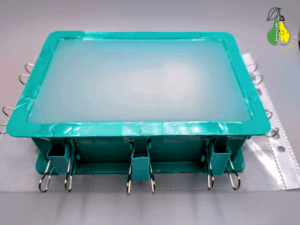
Here’s the final result I got. As you can see, the unevenness could have been avoided if I had used acetate film.
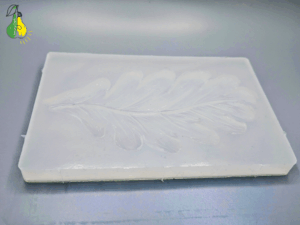
Silicone Mold for a Leaf
Making a silicone mold from a leaf turned out to be the easiest. I used the same principle described above.
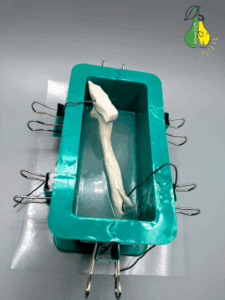
Silicone Mold for a Twig
Creating a silicone mold for the twig proved to be a significant challenge. It is inherently difficult to design a multi-part mold for such a small and complex piece. To preserve the structural integrity of the resulting chocolate, I aimed for a mold divided into no more than two parts, as additional seams could compromise the finished product’s fragility.
This is what my first attempt looked like.
I bought a food-grade release agent and applied it to the hardened first half of the silicone mold. But it didn’t work, and the layers stuck together tightly.
I found a solution and will write a separate article about it next time. For now, I’m pleased to present the effective result of that process.
To facilitate the removal of the finished chocolate, I cut a slit into the top of the mold. While this method isn’t ideal, it serves as the best solution I have for now, and I am confident I’ll develop a more convenient technique in the future.
I then thoroughly washed and dried all the finished silicone acorn molds in hot water with detergent.
I will certainly dedicate a separate article to the resulting chocolate acorn. It’s truly a rewarding process to create something so unique and personal and see the results of your effort come to life.
See you soon!